[INTERNAL] How to extend the size of a Linux Virtual Machine hardrive
Anonym
To extend the size of an already (small) VM hardrive, simply follow the steps:
1- Shut down the Linux VM that we want to increase the size of its hardrive
2- In the WMWare Client in your computer click on the virtual machine that you would like to increase the size of its hardrive.
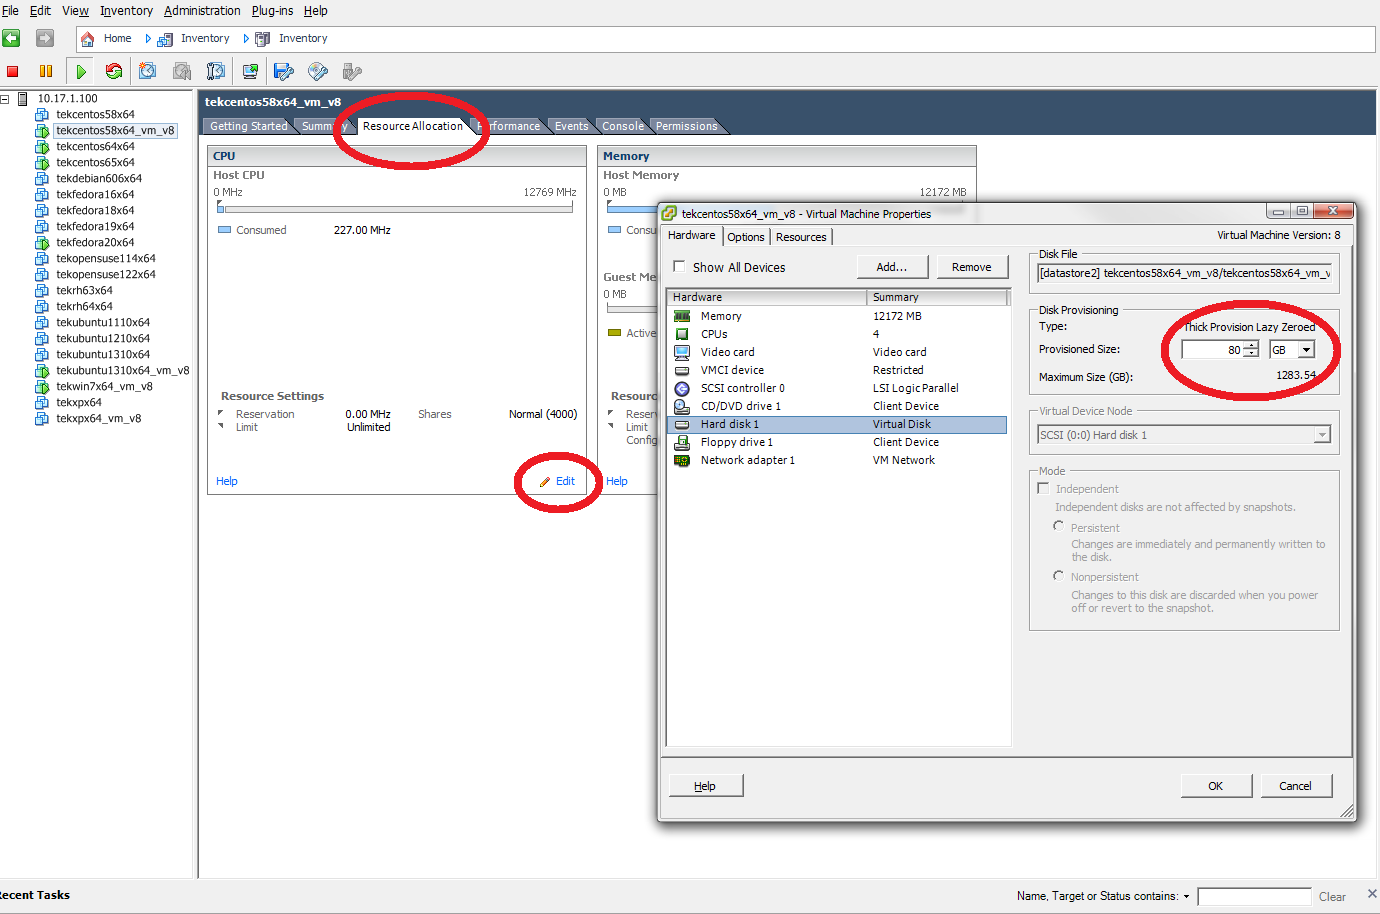
3- Go to the Resource Allocation tab and Edit the system: then increase the hardrive size.
4- Now, we need to create and activate a new partition in Linux so that we can extend the hardrive to use the extra space that we allocated in step 2). Follow the steps.
Note 1: You need to be super user, and be located in the top root directory to be able to use the "fdisk" program:
su -
Note 2: In step 5 of the link below, choose device name sda
The following information was taken from the VMWare Knoledge Base website:
http://kb.vmware.com/selfservice/microsites/search.do?cmd=displayKC&docType=kc&docTypeID=DT_KB_1_1&externalId=1006371
Note: These steps only apply to EXT3 file systems.
Caution: VMware recommends having a complete backup of the virtual machine prior making these changes.
-
Power off the virtual machine.
-
Edit the virtual machine settings and extend the virtual disk size.
-
Power on the virtual machine.
-
Identify the device name, which is by default /dev/sda, and confirm the new size by running the command:
# fdisk -l
-
Create a new primary partition:
- Run the command:
# fdisk /dev/sda (depending the results of the step 4)
- Press p to print the partition table to identify the number of partitions. By default there are 2: sda1 and sda2.
- Press n to create a new primary partition.
- Press p for primary.
- Press 3 for the partition number, depending the output of the partition table print.
- Press Enter two times.
- Press t to change the system's partition ID
- Press 3 to select the newly creation partition
- Type 8e to change the Hex Code of the partition for Linux LVM
- Press w to write the changes to the partition table.
- Restart the virtual machine.
-
Run this command to verify that the changes were saved to the partition table and that the new partition has an 8e type:
# fdisk -l
-
Run this command to convert the new partition to a physical volume:
# pvcreate /dev/sda3
-
Run this command to extend the physical volume:
# vgextend VolGroup00 /dev/sda3
Note: To determine which volume group to extend, use the command vgdisplay.
-
Run this command to verify how many physical extents are available to the Volume Group:
# vgdisplay VolGroup00 | grep "Free"
-
Run the following command to extend the Logical Volume:
# lvextend -L+#G /dev/VolGroup00/LogVol00
Where # is the number of Free space in GB available as per the previous command. Use the full number output from Step 10 including any decimals.
Note: to determine which logical volume to extend, use the command lvdisplay.
-
Run the following command to expand the ext3 filesystem online, inside of the Logical Volume:
# ext2online /dev/VolGroup00/LogVol00
Note: Use resize2fs instead of ext2online if it is not a Red Hat virtual machine.
-
Run the following command to verify that the / filesystem has the new space available:
# df -h /