Using ArcGIS Online Image Services in ENVI
Anonym
In the upcoming ENVI 5.2 Service Pack 1 release we made numerous enhancements to our Esri Image Services support including the ability to use the image services available with an ArcGIS Online subscription account. The new image services functionality includes support for username & password via token-based authentication and is supported in both the ENVI application plus associated API (ENVI::OpenRaster). To take the improved image services support for a test drive I took advantage of Esri's 60-day free ArcGIS trial which provides access to 200 ArcGIS Online service credits.
To get started I went to the ArcGIS Online website and clicked on the Sign Up for a Free Trial Now link button at the bottom of the webpage. After completing the account creation and registration process I received the message "Your ArcGIS Online trial account is now active" then shortly thereafter received an e-mail with a temporary ArcGIS Online Subscription Account ID.
To test the new image services support I decided to use the World Elevation dataset as the DEM in a RPC orthorectification of a WorldView-3 Ortho Ready 2A Standard data product (courtesy of DigitalGlobe). This process involved the following steps:
- Launch ENVI 5.2 SP1 (this won't work in older versions)
- File > Open and select the WorldView-3 multispectral dataset *.TIL file
- File > Remote Connection Manager
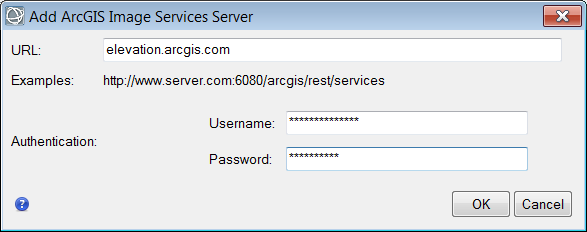
- Connection > Add ArcGIS Image Services Server...
- In the resulting dialog I enter "elevation.arcgis.com" in the URL field followed by my ArcGIS Online username and password then press the "OK" button:
Back in the Remote Connection Manager dialog I see a "Retrieving Information..." message while ENVI is communicating with the ArcGIS Online server. Once the necessary information on the available image services is obtained I can select the Terrain dataset. In order to open the real 32-bit floating-point terrain data from this image service (which is what I want for RPC orthorectification processing) I need to change the "Image Format" parameter to "TIFF" before pressing the "Open" button:

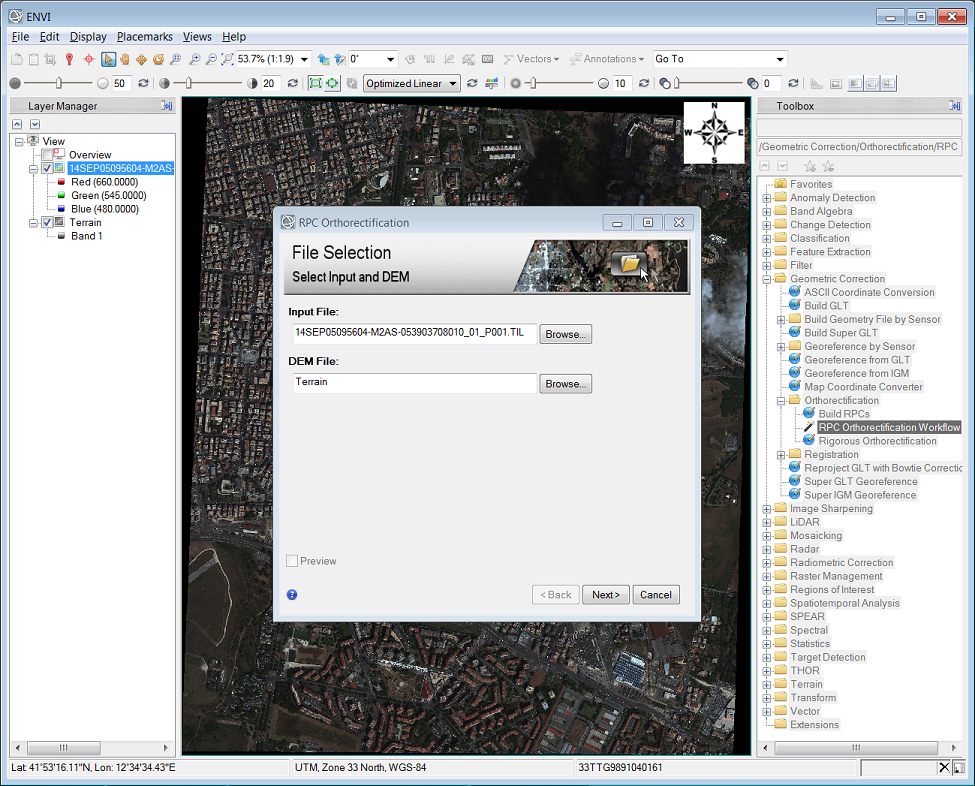
Once the "Terrain" raster dataset layer is loaded and displayed I can close the Remote Connection Manager dialog (it also helps to drag the WorldView-3 image back on top in the Layer Manager so it is visible). Next I launch "Geometric Correction/Orthorectification/RPC Orthorectification Workflow" from the ENVI toolbox along the right-hand side (Hint: simply enter "rpc ortho" in the "Search the toolbox" at the top-right). By default the RPC Orthorectification workflow will use the "GMTED2010.jp2" file included in the ENVI software installation so next to the "DEM File" box I need to press the "Browse..." button then select "Band 1" under the "Terrain" raster dataset:
After pressing "Next>" to advance the workflow to the final step I change the "Grid Spacing" parameter on the "Advanced" tab to "1" so the RPC-based transform is calculated for each pixel in the input WorldView-3 image. Finally I specify an output filename and press "Finish" to execute the RPC orthorectification process. As you can see in the following animation the orthorectification definitely has a significant impact on the geo-positional accuracy of this dataset:
Image data courtesy of DigitalGlobe