17638
IDL Workbench Guide
Table of Contents
- The IDL Workbench
- Exploring the IDL Workbench
- The IDL Code Profiler
- Projects
- Working directory
- Preferences
- Search Path
- Source Control Tools
- The IDL Help system
-
References
The IDL Workbench
The IDL Workbench is the application interface for IDL. It replaces the IDL Development Environment (IDLDE) included with IDL before version 7.0. The IDL Workbench is built on Eclipse (http://www.eclipse.org), a powerful and popular open-source framework for building development environments. The Workbench provides editing and debugging tools in an interface that looks and behaves the same way on all platforms supported by IDL. The figure below shows an annotated screenshot of the IDL Workbench.
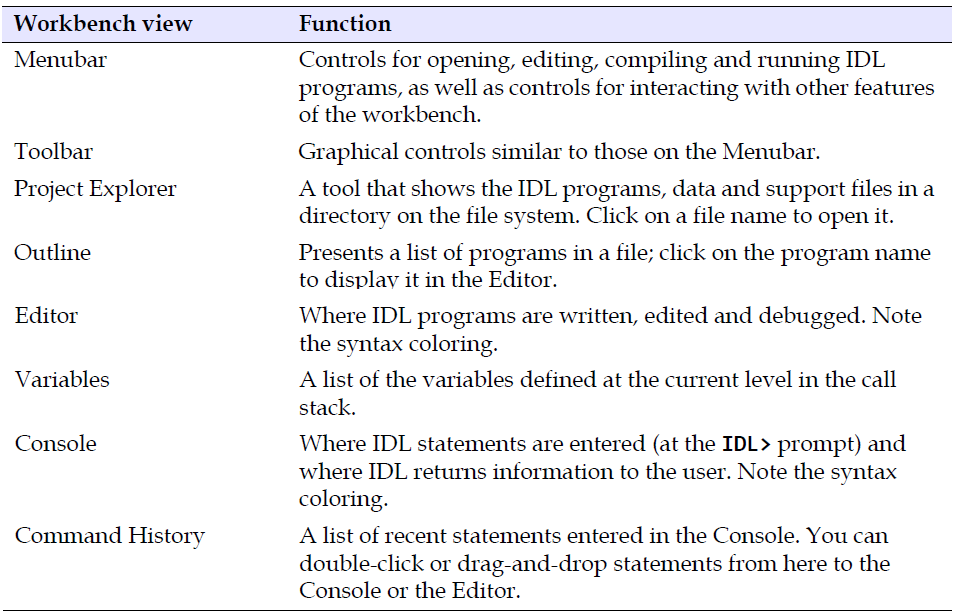
The following table shows the definition of some of the above elements (called Views in the Eclipse terminology) of the Workbench:
Views can be moved and docked in different locations in the workbench, or they can be torn off and placed elsewhere on your desktop.
For a complete summary of each IDL Workbench components displayed in the figure above, please go to the following Help Article:
Help Article #4295: IDL Workbench Reference
There is, as well, a YouTube video that takes the user through some of the basics of the IDL Workbench. Please go to the following address:
http://youtu.be/TTeZbFWy8YI
Go back to the Table of Contents
The best way to learn about the IDL Workbench is to experiment with it. Here’s a series of examples to try. Note that these are first steps.
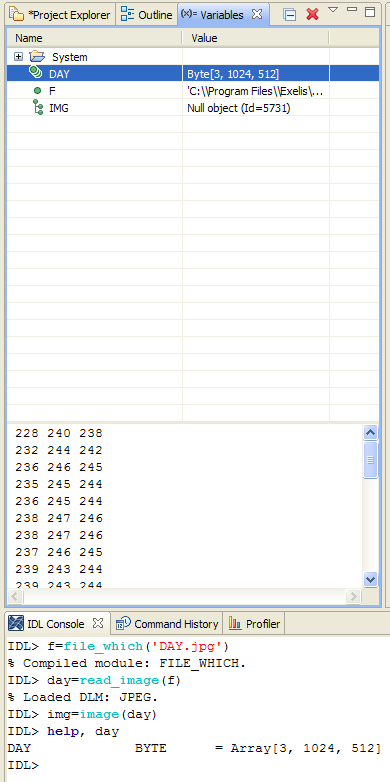
1. In the IDL Console, type the following commands:
IDL> f = file_which('DAY.jpg')
IDL> day = read_image(f)
2. The image is now read into the IDL variable called "day" in this example. Get information on the variable "day" with the HELP procedure:
IDL> help, day
DAY BYTE = Array[3, 1024, 512]
3- To display the image you can now call the IMAGE() function by typing:
IDL> img=image(day)
Note that the functions FILE_WHICH, READ_IMAGE and IMAGE, appears in a turquoise color in the Console. This is called syntax coloring; it helps code stand out when writing programs in the Editor or entering statements at the IDL> prompt, making the code easier to read.
Note that the following views are updated:
• The Variables view lists the variable DAY, which holds the image pixel data. You can also see that by selecting the variable name, some of the values are shown below the list (if the values of the variable are not shown you will need to explicitly make that part of the view visible, by click in the upside-down small triangle on the top right corner of the Variable view. Then, select the Layout)
• The Console reports each command entered, as well as the compilation of certain modules used to execute those commands.
See Figure below:
4. The Content Assist feature saves time. At the IDL> prompt, type only the first two letters of the HELP procedure, then select <Ctrl>.<Space> on your keyboard.
A menu of possible completions appears:
Select the statement to complete from the Content Assist dialog using the arrow keys on your keyboard. Content Assist is also available in the Editor.
5. Look at the Command History view. (If you can’t find the Command History view, select it from Window -> Show View in the Menubar.) All the commands we’ve used recently are listed there. These commands can be dragged and dropped to the IDL> prompt or into the Editor. The Command History persists across sessions. At the IDL> prompt, you can also use the up and down arrows on the keyboard to retrieve statements typed earlier.
6. There are myriad keyboard shortcuts in the workbench. Keyboard shortcuts save time. For example, instead of using the mouse, use <Ctrl>.i to put focus at the IDL> prompt.
The Table below displays a set of selected keyboard shortcuts available in the workbench. Shortcuts are given for both the Default and Emacs styles. In the table, “C” stands for the <Ctrl> key, while “M” stands for the <Alt> key.
Table 1: Selected Workbench keyboard shortcuts.
A quick reference of available keyboard shortcuts can be accessed from Help -> Key Assist... in the Workbench Menubar. An unabridged table of keyboard shortcuts is given in the IDL Workbench preferences (see “Preferences” below). You can also define your own keyboard shortcuts there.
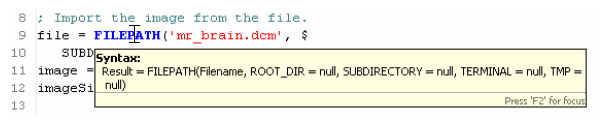
7. Open the IDL program bytescaling_example.pro using the .edit executive command:
IDL> .edit bytescaling_example
The source code for the program BYTESCALING_EXAMPLE appears in the Editor. Note that, like in the Console, the source code in the Editor has syntax coloring.
8. The Editor has a Hover Help feature. Place your cursor over the FILEPATH function on line 9 of bytescaling.pro. A pop-up window appears, giving quick information about this routine:
9. Open another program file, maskingimages.pro, using the .edit command:
The source for this program appears in a separate tab in the Editor. You can cycle through open Editor tabs with the <Ctrl>.F6 keyboard shortcut.
10. Double-click the bytescaling.pro tab on the Editor. This maximizes the Editor window. Double-click again to return the window to its original size.
11. Select the maskingimages.pro tab on the Editor. Compile and run the MASKINGIMAGES program by selecting the F8 key.
12- A very useful capability of the IDL Workbench is the ability of create a profile of any code run. You can add the "Profiler" tab to the console by going to the menu: Window --> Profiler. The Profiler tab will appear, as shown in Figure 1 below.
Go back to the Table of Contents
The IDL Code Profiler
The IDL Code Profiler helps you analyze the performance of your applications. You can easily monitor the calling frequency and execution time for procedures and functions.
To use the Profiler you can follow the steps below:
a- Having maskingimages.pro already open in the Editor window, click in the Profiler tab.
b- Click now in the button that will "Enable" the profiler. See Figure 1.
Figure 1 : IDL console and the Profiler tab.
c- Once the Profiler is enabled, run the code.
d- When the program completes, go back to the Profiler tab and click in the same button as the one used to enable the profiler (see point 2 above), this will stop the profiler action. After the profiler stops, you will see the results, see Figure 2 below. That figure shows the value of different times taken by each of the routines and statements used in the IDL code that is being tested.
Figure 2: Profiler tab.
Go back to the Table of Contents
Projects
The IDL Workbench uses projects, a concept inherited from Eclipse, to organize files.
The Project Explorer view (see Figure 3) acts like an embedded file browser in the Workbench (it looks suspiciously like Windows Explorer). With it, you can browse files related to your work in IDL. More importantly, projects also provide an easy way to manage IDL’s path—the set of directories IDL searches to find programs—from the workbench. Path is discussed in more detail in the “Search path” section later in this article.
By default, a project named “Default” is provided. It maps to a directory named Default on the filesystem. You can verify it lives under HOME/IDLWorkspace82, where HOME is your home directory, by right-clicking on it in the Project Explorer and selecting Properties from the menu. A good use for this Default project is as a scratch directory for temporarily storing files. We’ll use it in class as a place to store our work.
You can easily map existing directories on your computer’s filesystem to new projects. For example, we’ll set up the directory containing the IDL Code examples as a new Workbench project. Here are the steps to follow:
1. From the Menubar, select File -> New Project... The New IDL Project dialog appears (see Figure 3). Notice that as an example, the directory that is being chosen is called "IDL Code Examples" under a user name called "fsantoro".
Figure 3: The New IDL Project dialog.
2. In this example, change the name of the project from “NewProject” to “IDL Code Examples”.
3. Use the Browse button to find and select the location of the directory that contains your own IDL pro code. For example, you could have a folder called "IDL Code Examples".
4. Leave the button titled “Update IDL path when project is opened or closed” checked to allow IDL to manage the path for this project.
5. Click the Finish button. The new project will appear in the Project Explorer view of the workbench. Your Project Explorer should now look like this:
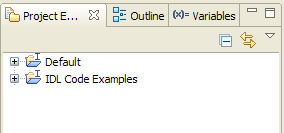
If the "IDL Code Examples" is used frequently in your work, then an IDL project provides a convenient way to browse and access these files.
For more information about using IDL Projects in the Workbench, please go to the Documentation Center:
http://www.harrisgeospatial.com/docs/Projects.html
Where you will find topics like: Creating Projects, Building Projects, Running Projects, IDL Project Properties, IDL Build Properties, IDL Compile Order, ENVI Extension Wizard.
Go back to the Table of Contents
Working directory
IDL has the concept of current or working directory. The working directory is the default location IDL looks to when opening or saving a file. The workbench’s Console displays it in a droplist:

This is the home directory for the user “fsantoro” on Windows. On startup, the Workbench defaults to the user’s home directory ($HOME on UNIX-based systems or %HOME% on Windows).
In command-line mode, the working directory is the directory from which you start IDL. For example:
$ pwd
/home/fsantoro/stuff
$ idl
IDL> cd, current=c & print,c
/home/fsantoro/stuff
You can use the CD procedure to change directories. For example,
IDL> cd, '..'
changes IDL’s working directory to the parent of the previous directory. CD can be used in the Workbench or in IDL’s command-line mode. The Workbench also allows you to change directories using the Console droplist shown above.
Go back to the Table of Contents
Preferences
IDL has numerous configurable system preferences. Preferences can be set through the Workbench or through command-line tools available in either the Workbench or IDL command-line mode. Here, we set a preference that affects only the workbench, the initial working directory.
1. In the Workbench Menubar, select Window . Preferences (on Mac OS X, select IDL -> Preferences). Within the Preferences dialog, select the IDL item from the left pane. The dialog should look like Figure 4 below.
Figure 4: The Workbench preferences, showing IDL preferences.
2. Next, set the “Initial working directory” field to your Default project directory, either by entering it manually or by using the Browse button.
3. Select OK. The Workbench will use this setting for the initial working directory in subsequent IDL sessions.
IDL’s system preferences can also be accessed through the routines listed in Table 2.
Table 2: IDL preference system routines.
For example, list the preferences set in your current IDL session using HELP:
More information on IDL system preferences can be found in the IDL Help system.
Go back to the Table of Contents
Search Path
The search path is an ordered list of directories that IDL searches to find program, batch, SAVE and data files. Using a path is efficient: rather than looking through the entire directory tree of a file system, only a subset of directories where IDL might expect to find files is searched.
Path is very useful. IDL uses it not only to find its routines but also user-defined routines. A well-constructed path makes IDL much easier to use.
If you use the workbench, you can use projects to manage IDL’s path, as shown in the section “Projects”. However, the paths managed in projects aren’t available in IDL’s command-line mode. If you use command-line mode, or if you alternate between the command line and the workbench, it’s recommended that you instead use the path preference to manage IDL’s path.
Let’s query the preference system to find IDL’s default path:
IDL> path = pref_get('idl_path')
IDL> print, path
<IDL_DEFAULT>
One entry, <IDL_DEFAULT>, exists; it’s a special token that IDL replaces with paths to the lib and examples subdirectories of the IDL distribution. This is how IDL finds routines such as PLOT, FILE_WHICH and READ_BINARY, for example.
For user-defined paths, we’ll need to modify this IDL_PATH preference. In the “Projects” section, users of the Workbench set up the "IDL Code Examples" distribution as a project. Let’s do the same for users of IDL command-line mode.
If the "IDL Code Examples" directory is located under your home directory, e.g., for a user "fsantoro" in "/home/fsantoro/IDL Code Examples", then construct a new path using
IDL> new_path = path + path_sep(/search) + expand_path('+/home/fsantoro/IDL Code Examples')
In this statement, PATH is the starting path we retrieved from PREF_GET above, PATH_SEP makes the appropriate path delimiter (here, a colon “:”), EXPAND_PATH, in conjunction with the “+” sign, lists all the children of "/home/fsantoro/IDL Code Examples".
Apply this new path to IDL’s path preference:
IDL> pref_set, 'idl_path', new_path, /commit
then force IDL to recognize the new additions to its path by rebuilding the path cache:
IDL> path_cache, /rebuild
Go back to the Table of Contents
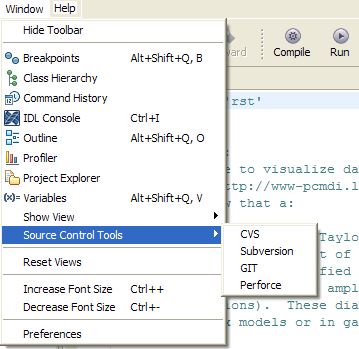
Source Control Tools
IDL gives you the ability to use source control directly from the Workbench. The source control tools that come with IDL include:
- CVS
- Git
- Perforce
- Subversion
Simply go to the following menu in the IDL Workbench:
For more detail description of the available tools, please go to:
http://www.harrisgeospatial.com/docs/IDL_Features_to_Help_You_Develop_Code.html
There is also a YouTube tutorial that can be seen here:
http://youtu.be/tzOPAOz09Hg
Go back to the Table of Contents
The IDL Help system
Every IDL installation is equipped with extensive built-in documentation in the IDL Help system. With the Help system, you can learn about
• features of the IDL Workbench
• IDL routines and their inputs
• programming interfaces for various file formats
• how to communicate with Java, C and Fortran programs
as well as a great deal of general information about IDL. The Help system is the ultimate reference tool for working with IDL. Always keep it open when working with IDL.
Figure 5: The IDL Help system browser.
Start the Help system by selecting Help . Help Contents from the IDL Workbench Menu bar. On UNIX-based systems, the Help system can also be started from a shell prompt:
$ idlhelp
The Help system browser (see Figure 5 above) is divided into left and right panels. The right panel initially displays the Help system home page. The left panel has tabs for
1. browsing the contents of the Help system,
2. browsing the index of the Help system, and
3. searching the Help system.
Though the Help system has information on just about every conceivable IDL topic, finding the information you need can be difficult. A recommended technique is to use the Index tab if you have some idea of what you’re looking for, and the Search tab otherwise.
You can quickly search the Help system from the IDL Workbench command line by typing a question mark followed by the search term. For example, to get help on the SURFACE function, type
IDL> ?surface
The Help system page for SURFACE appears in the Help system browser.
The IDL Help system can be also access through the web at:
Go back to the Table of Contents
References
For additional help on these topics see our IDL Documentation Center here:
About the Eclipse Foundation. The Eclipse Foundation, 2009. <http://www.eclipse.org/org/>. Accessed 2009-06-16.
Bowman, K. P. An Introduction to Programming with IDL. Boston, Massachusetts: Academic Press, 2006.
Fanning, David F. IDL Programming Techniques. Second Edition. Fort Collins, Colorado: Fanning Software Consulting, 2000.
Galloy, Mike. Modern IDL.
A Guide to IDL Programming. Michael D. Galloy, 2011.
Gumley, Liam E. Practical IDL Programming. San Francisco: Morgan Kaufmann, 2001.
Kling, Ronn. IDL Primer. Marshall, Virginia: KRS, Inc., 2007.
Go back to the Table of Contents