Creating Animations and Videos in IDL
Oftentimes it is easier for us to perceive change in images if we animate the images in a video. These comparisons could be between images of the same subject taken at different times, or images acquired contemporaneously but with different techniques or wavelengths.
The NV5 Custom Solutions team frequently include video production and display tools in the applications and solutions we provide to our clients.
Let's say you've been monitoring for optical changes in the galactic cluster Abell 115, an image of which is located in your IDL examples/demo/demodata directory.
IDL> read_jpeg, filepath('abell115.jpg', subdir = ['examples','demo','demodata']), image1
IDL> i = image(image1)
Let's copy a region of interest from one place to another to simulate the discovery of a supernova.
IDL> image2[*, 250:260, 250:260] = image2[*, 265:275, 350:360]
IDL> i.setdata, image2
The change is fairly small, but you should see it centered in the image.
To make the "discovery" more apparent, we can animate the changes.
One display technique involves a fade operation in which images dissolve into one another over time. Each pixel transitions over time from one color to another. Our human visual systems are drawn to areas of change in animations. Depending on the effect that's desired for the viewer, all pixels may transition equally and in parallel, or some may transition more slowly or rapidly than others.
First, select a number of individual "frames" over which the change will occur. The number of frames defines how smoothly the transition takes place between images. A value of 2, for example, would produce a blinking effect with no interpolated transition.
IDL> nframes = 32
Next, loop over the frames, weighting the displayed image by proportional contributions between the two input images at each time step.
IDL> for f = 1., nframes do i.setdata, byte(image2*(f/nframes) + image1*(1-f/nframes))
(For the purpose of code compactness in this example, I'm looping using a floating point value but in general this is not recommended.)
Next you may wish to share your "discovery" with your colleagues in the form of a video. The IDL class IDLffVideoWrite lets you create video output files in a number of different formats.
There are three basic steps you will use to create a video. Create an object that is associated with an output file, create a video stream with the appropriate frame dimensions and frame rate for display, then add each image frame to the stream.
Get the dimensions of the image and define a frame rate, in units of frames per second.
IDL> d = size(image1, /dimensions)
IDL> fps = 30
The division of the number of frames by the frame rate will determine the elapsed time of your animation.
Create a video object. In this example, I will write a file to my temporary directory.
IDL> a = filepath(/tmp, 'abell115.avi')
IDL> v = idlffvideowrite(a)
The IDLffVideoWrite object determines the default format for the video output according to the file name extension, in this case ".avi". See the online documentation for alternative formats.
Create a video stream within the video object, specifying the X and Y dimensions of each image frame, along with the frame rate, using the IDLffVideoWrite::AddVideoStream method.
IDL> vs = v.addvideostream(d[1], d[2], fps)
Rather than animating to the graphics windows, we'll loop over the frames writing data to the video stream instead using the IDLffVideoWrite::Put method.
IDL> for f = 1., nframes do !null = v.put(vs, byte(image2*(f/nframes) + image1*(1-f/nframes)))
There is no explicit call to close the action of writing frames to the file. Instead, we signal the completion of writing the data by simply destroying the object reference.
IDL> obj_destroy, v
The video file is now closed and available for sharing with our colleagues. To test the contents, simply SPAWN the path to the video file, assuming the file name extension is known to the shell.
IDL> spawn, a, /hide, /nowait
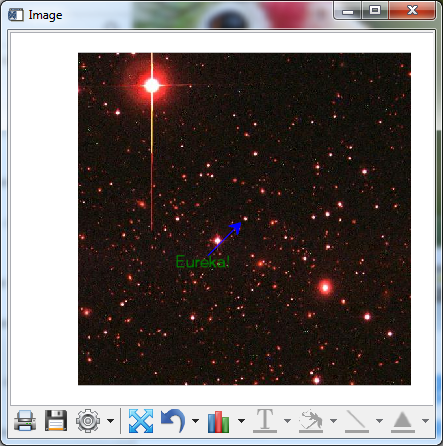
In order to make the video more interesting, you might consider adding an annotation such as TEXT or an ARROW to your IMAGE display, then copying the display data as your frame input rather than displaying only the raw data directly. Additionally, see the documentation for the method IMAGE::CopyWindow, used below.
You can copy and paste the following to your IDL command line to see the result.
IDL> v = idlffvideowrite(a)
IDL> vs = v.addvideostream(d[1], d[2], fps)
IDL> i = image(image1, dimensions = d[1:2])
IDL> ar = arrow([200, 250], [200, 250], color='blue', /data, /current)
IDL> t = text(150, 180, 'Eureka!', color = 'green', /data, /current)
IDL> for f = 1., nframes do begin & $
IDL> i.setdata, byte(image2*(f/nframes) + image1*(1-f/nframes)) & $
IDL> !null = v.put(vs, i.copywindow()) & $
IDL> endfor
IDL> obj_destroy, v
IDL> spawn, a, /nowait, /hide
The video file resulting from these steps can be found here.