Hacking Animations on Jupyter
All the world's a vine, and all the graphics merely players
The Python bridge introduced in IDL 8.5 includes support for the IDL IPython Notebook Kernel.
I don't claim to be an expert at IPython or Jupyter notebooks. In fact I'd never used either before this week.
Of course, I decided the first thing I had to try with IDL would be relatively challenging.
But first, a little background on the fundamentals is required.
Jupyter and IDL
A Jupyter notebook is a very rich web-based interactive computational environment, as described by Wikipedia. Though designed as an interface for Python programming, through the IDL bridge the functionality is expanded to our orbit of influence as well.
In summary, you enter IDL commands in a web browser text entry box and display the resulting static text and graphics output in the same browser tab.
When you execute the commands via a UI element in the browser, the text is sent from the web server in the IPython notebook application through the Python bridge to an IDL Runtime process where the commands are executed sequentially, as if manually entered at the IDL command line.
The commands you enter into a notebook persist as a stand-alone file that can be shared with other users, provided they have installed both IDL and their notebook kernel.
Text output from IDL, for example from HELP or PRINT, will be echoed to the web page, as will certain types of graphics. Output is queued until an entire code cell has executed.
IDL Graphical Output
When graphics are generated by IDL, the image data is compressed into a PNG-format graphics buffer which is in-lined through BASE64 encoding into the HTML that populates the output Jupyter canvas in your browser. No stand-alone image file is needed. If you inspect the image element from above in your browser, you will see it represented like this:

By "in-line" the effect is as if you had written a PNG file to disk, then opened the file using OPENR and then executed READU on the file into a byte buffer. It's treated as a "blob" of data. The Base-64 encoding converts the binary data into ASCII for easy transmission over HTML. The web browser decodes the data back into its byte form, then reads it as if from an image file on disk.
Internally, the IDL interpreter is aware that it's running in the context of the Python bridge and does some special tricks to redirect your graphics output.
When graphics output is generated with Direct Graphics or function graphics and sent to the default display device, it's routed through a special pipeline that (in the end) creates the PNG in memory. As discussed below, Object Graphics output requires a slightly different idiom.
An upshot is that only the final graphics output that's been generated at the end of your command sequence will be sent back to the web page.
For example, if you were to execute a loop to animate through frames using the TV Procedure you will not get an animation in your web browser. Only the final display frame will be returned. and your browser will not receive any of the intermediate frames.
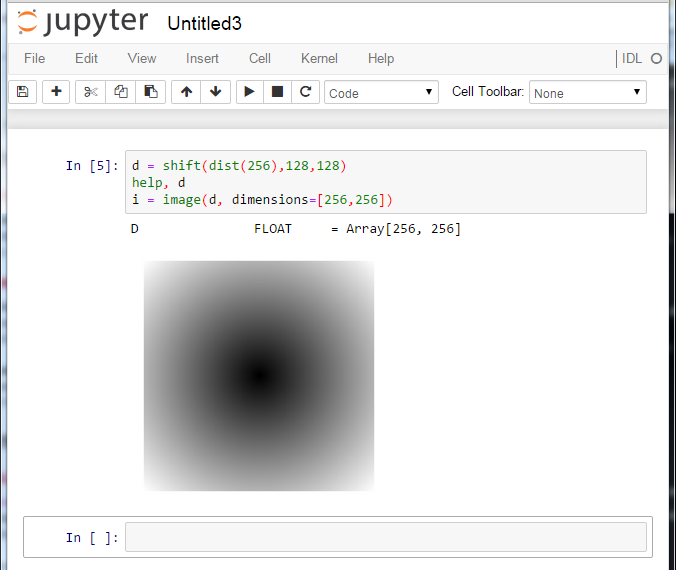
For comparison, execute the following in a Jupyter IDL notebook and compare the output against the same command run from a standard IDL command prompt.
In [0]: window,0&for i=0,3 do begin&tvscl,shift(dist(256),i*64,i*64)&wait,1.&endfor
(Special note: In IDL 8.5, you will want to explicitly create a WINDOW prior to generating any Direct Graphics within a single code cell. Later versions may not require this.)
Object Graphics Tricks
For Object Graphics output, additional trickery lies under the hood.
If you attempt to use an IDLgrWindow or one of its family as your destination, you will find that a floating graphics window outside your web page will be created. Generally, this isn't what you want.
Instead, in the Python bridge idiom you must use an IDLgrBuffer object as your destination. This requirement is indeed documented but it takes some effort to find it.
Somewhere deep inside IDL it recognizes you're running a bridge object so data drawn to any IDLgrBuffer will be scraped at the completion of your commands then compressed into a PNG.
Each IDLgrBuffer will produce a separate canvas in your Jupyter web page. You should keep this in mind if the code you are calling uses other IDLgrBuffer objects internally and those IDLgrBuffer object references are not destroyed before your script completes.
Animations
Because the default action of the Python bridge is to display screen scrapes of static image windows, we need to pull a couple tricks to generate and display animation.
First of all, if we want to generate an embedded animation for display in the notebook we must write the frames to a format that we can embed in the HTML that the browser will interpret.
One option is to create an animated GIF that may be in-lined into the HTML. An example of this is shown below, a rotating sphere.

As we accumulate frames, we can write those images to file via IDL's standard WRITE_GIF with the appropriate keywords set for multi-frame animations, frame delay times, etc.
We can read the contents of the file into memory as a BYTARR then IDL_BASE64-encode the bytes. The resulting ASCII string is as valid for a web browser as the encoded version of the static PNG file.
How can we trick the IPython Notebook into using this byte stream instead of the screen scrape?
Hackery - Beware!
Locate your copy of the (ahem) undocumented routine encodegraphic.pro distributed in <IDL_DIR>\lib. This function is called once by the Python bridge for each graphics window created within the context of an IDL code block in your Jupyter notebook.
Alas, the version that shipped with IDL 8.5 has a couple bugs that will be addressed in a future release of IDL. But we shall ignore those for now since they don't impact our needs.
If you open the source file in an editor window, you *should* recognize the logic within it. If a Direct Graphics window is being accessed, our old friend TVRD() is called, for example. If you don't recognize the syntax for "new graphics" or Object Graphics, you might best back slowly away from this blog now.
Each graphic type populates a simple BYTARR buffer of the screen scrape. The byte data are fed to WRITE_PNG (using the, ahem, undocumented BUFFER keyword) and the output is then Base-64 encoded before being returned to Python.
Our goal will be to replace the buffer generated with WRITE_PNG with a byte stream we generate independent of the screen scrape.
Let's concentrate on the Object Graphics branch, where the input variable type will be set to 2. The default action is to simply read the image data from the IDLgrBuffer object.
One great thing about Object Graphics is that we can associate other data with our objects, or even create special subclasses of objects with their own behaviors and properties. It's the latter technique we'll investigate.
Below is an updated version of encodegraphic.pro. I want to think it's a "do no harm" modification, shown in bold typeface.
function EncodeGraphic, id, type

  compile_opt idl2, hidden, static
  on_error, 2

  if (N_PARAMS() ne 2) then MESSAGE, 'Incorrect number of arguments.'
  CATCH, ierr
  if (ierr ne 0) then begin
    CATCH, /CANCEL
    MESSAGE, /RESET
    return, !NULL
  endif

  case (type) of
    0: begin
      wcurrent = !D.WINDOW
      WSET, id
      w = TVRD()
      WSET, !D.WINDOW
      end
    1: begin
      obj = OBJ_VALID(id, /CAST)
      if ~ISA(obj) then return, !NULL
      w = obj.CopyWindow(RESOLUTION=300)
      end
    2: begin
      obj = OBJ_VALID(id, /CAST)
      if ~ISA(obj) then return, !NULL
      if (OBJ_HASMETHOD(obj, 'GetImageBuffer')) then begin
        b = obj.GetImageBuffer()
      endif
      if (b eq !null) then begin
        obj.GetProperty, IMAGE_DATA = w
      endif
      end
    else: begin
      MESSAGE, 'Unknown graphics type: ' + type.ToString()
      end
  endcase
  if (b eq !null) then begin
  ; Convert and return
    WRITE_PNG, '', w, BUFFER=b, red, green, blue
  endif
  RETURN, IDL_BASE64(b)
end
Basically in the Object Graphics branch of the CASE statement, if the class of the object has a method named ::GetImageBuffer, then that method is called to get the image data rather than through a direct screen scrape. The default IDLgrBuffer class does not have this method, so for that case the code will function as before.
But if we create a special subclass of IDLgrBuffer and use that for generating our animations, we can subvert the dominant paradigm with disruptive technology.
Why, here is such a class, now.
Function AccumulatinggrBuffer::GetImageBuffer
  Return, self.Animations['GIF']
End

Pro AccumulatinggrBuffer::ResetFrames
  self.Frames = List()
  self.Animations = Hash()
End

Pro AccumulatinggrBuffer::ToAnimatedGIF, $
  Delay_Time = Delay_Time, $
  Repeat_Count = Repeat_Count
  On_Error, 2
  Catch, ErrorNumber
  If (ErrorNumber ne 0) then Begin
    Catch, /Cancel
    If (TempFile ne !null && File_Test(TempFile)) then Begin
      File_Delete, TempFile
    Endif
    If (LUN ne !null) then Begin
      Free_LUN, LUN
    Endif
    Message, /Reissue_last
    Return
  EndIf
  If (self.Frames.Count() eq 0) then Begin
    Message, 'No frames present.', /Traceback
  Endif
  self.GetProperty, Color_Model = CModel
  TempFile = FilePath(/Tmp, IDL_ValidName(SysTime(), /Convert_All) + $
    '_' + (Long(SysTime(1))).ToString() + '.gif')
  If (CModel eq 0) then Begin
    BigImage = self.Frames[0]
    Q = Color_Quan(BigImage, 1, Red, Green, Blue, Colors = 256, Get_Translation = T)
    For I = 0L, self.Frames.Count() - 1 Do Begin
      Write_GIF, TempFile, Color_Quan(self.Frames[I], 1, Red, Green, Blue, Translation = T), $
        Red, Green, Blue, $
        Delay_Time = Delay_Time ne !null ? $
        (Delay_Time.Length gt 1 ? Delay_Time[I] : Delay_Time ): !null, $
        Repeat_Count = Repeat_Count, $
        Close = I eq self.Frames.Count() - 1, $
        /Multiple
    EndFor
  EndIf Else Begin
    self.GetProperty, Palette = P
    If (Obj_Valid(P)) then Begin
      P.GetProperty, Red_Values = Red, Green_Valuues = Green, Blue_Values = Blue
    EndIf Else Begin
      Red = Bindgen(256)
      Green = Red
      Blue = Red
    Endelse
    For I = 0L, self.Frames.Count() - 1 Do Begin
      Write_GIF, TempFile, self.Frames[I], Red, Green, Blue, $
        Delay_Time = Delay_Time ne !null ? $
        (Delay_Time.Length gt 1 ? Delay_Time[I] : Delay_Time ): !null, $
        Repeat_Count = Repeat_Count, $
        Close = I eq self.Frames.Count() - 1, $
        /Multiple
    EndFor
  Endelse
  B = BytArr((File_Info(TempFile)).Size)
  OpenR, LUN, TempFile, /Get_LUN;, /Delete
  ReadU, LUN, B
  Free_LUN, LUN
  self.Animations['GIF'] = B
End

Pro AccumulatinggrBuffer::Draw
  self.IDLgrBuffer::Draw
  self.GetProperty, Image_Data = IData
  self.Frames.Add, IData
End

Function AccumulatinggrBuffer::Init, _Ref_Extra = Extra
  If (~self.IDLgrBuffer::Init(_Extra = Extra)) then Return, 0
  self.Frames = List()
  self.Animations = Hash()
  Return, 1
End

Pro AccumulatinggrBuffer__Define
  !null = {AccumulatinggrBuffer, $
    Inherits IDLgrBuffer, $
    Frames : Obj_New(), $
    Animations : Obj_New() $
  }
End
Essentially, each time the ::Draw method is called on an object of this class the graphics buffer is captured and stored internally in a LIST. This probably won't work well for a large animation, but we're going to be generating an animated GIF rather than a movie. Consider your resource needs wisely.
The method ::ToAnimatedGIF is responsible for accumulating the frames first into a 256-color GIF-format output file, then reading the byte stream from file into memory and storing that buffer within the object. There is a slight weakness in the current logic that assumes all the most dominant 256 colors in the animation sequence are represented in the first frame. See the documentation for COLOR_QUAN. Feel free to modify this logic to your own requirements!
The method ::GetImageBuffer is implemented to return the GIF animation buffer. I've tried to be a little flexible here for other formats as well. In the future I may opt to implement an APNG format, for example.
Animating Object Graphics
Now let's put it all together. Make a backup copy of your original encodegraphic.pro in <IDL_DIR>\lib and write the hacked version from above into that location.
[If you choose to make this modification, you may need to "maintain" the changes with future releases of IDL. A theoretical version 8.5.1 or later IDL installer, for example, may overwrite this file - and may fix additional bugs or add new features.]
Write the source for the AccumulatinggrBuffer class to accumulatinggrbuffer__define.pro somewhere in IDL's !path.
Start up an IPython IDL Notebook and enter the following into a code cell, then execute it.
b = accumulatinggrbuffer(dimensions = [128, 128])
v = idlgrview(viewplane_rect = [-1, -1, 2, 2], color = [255, 255, 255], depth_cue = [-1., 1.5])
b.setproperty, graphics_tree = v
o = orb(style = 1, color = [0, 125, 0])
v.add, o
for i = 0, 180 do begin & $
  o.rotate, [0, 1, 1], 2 & $
  b.draw & $
endfor
b.ToAnimatedGIF, Delay = 10, Repeat_Count = 0
This code should generate the rotating sphere shown below.

Animating Function Graphics
Rather than hacking further into encodegraphic.pro in order to support Function Graphics, we can use our accumulating buffer to capture frames from Function Graphics output.
x = findgen(360)*!dtor
y = cos(x)
p = plot(x,y,dimensions=[256,256], /buffer)
d = p.copywindow()
dim = d.dim
b = accumulatinggrbuffer(dimensions = dim[1:2])
v = idlgrview(viewplane_rect = [0, 0, dim[1], dim[2]])
b.setproperty, graphics_tree = v
m = idlgrmodel()
v.add, m
i = idlgrimage()
m.add, i
for ii = 0, 180 do begin & $
  p.setdata, x, shift(y, 4*ii) & $
  i.setproperty, data = p.copywindow() & $
  b.draw & $
endfor
b.ToAnimatedGIF, Delay = 1, Repeat_Count = 0
ireset, /no_prompt
This code generates a scrolling sine wave, as shown below.

Animating Direct Graphics
As with Function Graphics, rather than making a special code path in encodegraphic.pro to support Direct Graphics animations, we'll simply reuse the accumulating buffer object.
x = findgen(360)*!dtor
y = cos(x)
window, /free, /pixmap, xsize = 256, ysize = 256
b = accumulatinggrbuffer(dimensions = [256, 256])
v = idlgrview(viewplane_rect = [0, 0, 256, 256])
b.setproperty, graphics_tree = v
m = idlgrmodel()
v.add, m
i = idlgrimage()
m.add, i
for ii = 0, 180 do begin & $
  plot, x, shift(y, 4*ii) & $
  i.setproperty, data = tvrd(/true) & $
  b.draw & $
endfor
b.ToAnimatedGIF, Delay = 1, Repeat_Count = 0
wdelete, !d.window
The animated sine curve from Direct Graphics is shown below.
