A printer object represents a hardcopy graphics destination. When a printer object is created, the printer device to which it refers is the default system printer. To change the printer, utilize the printer dialogs (see DIALOG_PRINTJOB and DIALOG_PRINTERSETUP.)
Note: Objects or subclasses of this type can not be saved or restored.
Superclasses
None
Creation
See IDLgrPrinter::Init.
Properties
Objects of this class have the following properties. See IDLgrPrinter Properties for details on individual properties.
In addition, objects of this class inherit the properties of all superclasses of this class.
Methods
This class has the following methods:
In addition, this class inherits the methods of its superclasses (if any).
Examples
The following example demonstrates the process of printing the contents of an IDL graphics display object (a buffer or a window) to an IDLgrPrinter object. The resolution of the printed page is based on the resolution of the screen. The model object in the printer object must be scaled to maintain the same size as displayed on the screen. The location of the view must also be changed to center the display on the page.
PRO PrintingAnImage
convecFile = FILEPATH('convec.dat', $
SUBDIRECTORY = ['examples', 'data'])
convecSize = [248, 248]
convecImage = BYTARR(convecSize[0], convecSize[1])
OPENR, unit, convecFile, /GET_LUN
READU, unit, convecImage
FREE_LUN, unit
windowSize = convecSize
oWindow = OBJ_NEW('IDLgrWindow', RETAIN = 2, $
DIMENSIONS = windowSize, $
TITLE = 'Earth Mantle Convection')
oView = OBJ_NEW('IDLgrView', $
VIEWPLANE_RECT = [0., 0., windowSize])
oModel = OBJ_NEW('IDLgrModel')
oPalette = OBJ_NEW('IDLgrPalette')
oPalette->LOADCT, 27
oImage = OBJ_NEW('IDLgrImage', convecImage, $
PALETTE = oPalette)
oModel->Add, oImage
oView->Add, oModel
oWindow->Draw, oView
oWindow->GetProperty, RESOLUTION = screenResolution
windowSizeCM = windowSize*screenResolution
oPrinter = OBJ_NEW('IDLgrPrinter', PRINT_QUALITY = 2, $
QUALITY = 2)
oPrinter->GetProperty, DIMENSIONS = pageSize, $
RESOLUTION = pageResolution
pageSizeCM = pageSize*pageResolution
pageScale = windowSizeCM/pageSizeCM
oModel->Scale, pageScale[0], pageScale[1], 1.
centering = ((pageSizeCM - windowSizeCM)/2.) $
/pageResolution
oView->SetProperty, LOCATION = centering
oPrinter->Draw, oView
oPrinter->NewDocument
OBJ_DESTROY, [oPrinter, oView, oPalette]
END
Centering an Orb
The following example positions a view containing an orb object in the center of a page when it is printed. Centering the view is a common task. Using this example as a guideline, you can easily adapt it to meet your own needs.
PRO center_doc
dims = [5.0, 5.0]
oView = OBJ_NEW('IDLgrView', $
UNITS=2, $
VIEWPLANE_RECT=[-dims[0]/2, -dims[1]/2, dims[0], dims[1]], $
ZCLIP=[MAX(dims), -MAX(dims)], EYE=MAX(dims)+1, $
COLOR=[200,200,200])
oModel = OBJ_NEW('IDLgrModel')
oView->Add, oModel
oOrb1 = OBJ_NEW('orb', COLOR=[0,255,0], SHADING=1, $
STYLE=2, HIDDEN=0)
oModel->Add, oOrb1
oModel->Scale, dims[0]*0.4, dims[0]*0.4, dims[0]*0.4
oModel->Rotate, [1,1,0], 10
oLight = OBJ_NEW('IDLgrLight', TYPE=1, LOCATION=[1.5,1.5,2])
oModel->Add, oLight
oPrinter=OBJ_NEW('IDLgrPrinter', UNITS=2)
oPrinter->GetProperty, DIMENSIONS=pageSize
centering = ((pageSize - dims)/2.)
oView->SetProperty, LOCATION=centering, DIMENSIONS=dims
oPrinter->Draw, oView, VECTOR=1
OBJ_DESTROY,[oPrinter]
OBJ_DESTROY,[oView]
END
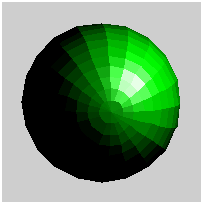
The following figure shows a subset of the output. The orb is positioned in the center of a printed page when you run this example.
Precisely Positioning Vector and Bitmap Output
The following example creates a model and draws some IDLgrAxis objects to the printer in vector mode. It then creates a second model for an orb object and plots the orb, drawing it to the printer in bitmap mode. The entire view is centered in the page, as shown in the previous example. However, this example precisely positions the orb and axes within the view using data units (defined as centimeters).
PRO center2_doc
viewDims = [10.0, 10.0]
orbLoc = [3.0, 4.0]
orbRadius = 2.2
oOrbModel = OBJ_NEW('IDLgrModel')
oOrb = OBJ_NEW('orb', COLOR=[0,255,0], SHADING=1, STYLE=2)
oOrbModel->Add, oOrb
oAxesModel = OBJ_NEW('IDLgrModel')
oX = OBJ_NEW('IDLgrAxis', 0, RANGE=[1,viewDims[0]-1], $
/EXACT, LOCATION=[orbLoc[0]-orbRadius, 1])
oAxesModel->Add, oX
oY = OBJ_NEW('IDLgrAxis', 1, RANGE=[1, viewDims[1]-1], $
/EXACT, LOCATION=[1, orbLoc[1]-orbRadius])
oAxesModel->Add, oY
oAxesModel->Add, OBJ_NEW('IDLgrPolygon', $
[0, viewDims[0], viewDims[0], 0], $
[0, 0, viewDims[1], viewDims[1]], STYLE=1)
oView = OBJ_NEW('IDLgrView', $
UNITS=2, VIEWPLANE_RECT=[0, 0, viewDims[0], viewDims[1]], $
ZCLIP=[MAX(viewDims), -MAX(viewDims)], EYE=MAX(viewDims)+1, $
COLOR=[255,255,255])
oTopModel = OBJ_NEW('IDLgrModel')
oView->Add, oTopModel
oLight = OBJ_NEW('IDLgrLight', TYPE=1, LOCATION=[1.5,1.5,2])
oTopModel->Add, oLight
oPrinter=OBJ_NEW('IDLgrPrinter', UNITS=2)
oPrinter->GetProperty, DIMENSIONS=pageSize
centering = ((pageSize - viewDims)/2.)
oView->SetProperty, LOCATION=centering, DIMENSIONS=viewDims
oTopModel->Add, oAxesModel
oPrinter->Draw, oView, VECTOR=1
oTopModel->Remove, oAxesModel
oTopModel->Add, oOrbModel
oView->SetProperty, VIEWPLANE_RECT = $
[-orbRadius, -orbRadius, 2 * orbRadius, 2 * orbRadius], $
LOCATION=[orbLoc[0]-orbRadius,orbLoc[1]-orbRadius]+centering, $
DIMENSIONS=[2*orbRadius, 2*orbRadius]
oPrinter->Draw, oView, VECTOR=0
OBJ_DESTROY,[oPrinter]
OBJ_DESTROY,[oView]
END
The following figure shows a subset of the output. The entire plot area is positioned in the center of a printed page when you run this example.

Version History
|
5.0 |
Introduced |
|
6.2 |
Added QueryRequiredTiles method
Added PRINTER_NAME property and revised NAME property
|
|
8.2 |
Added LINE_QUALITY property
|