This topic describes how to create workflows that provide a wide range of visual and functional features. See the following sections:
Default Workflow Behavior
Before learning how to customize workflows, you should first understand their default behavior as demonstrated in the Basic Structure of a Workflow topic.
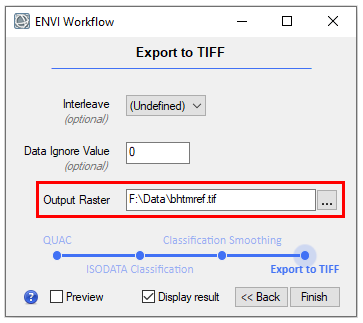
- Output file locations for intermediate steps will be hidden from users, and the files will be created in the directory specified by the Temporary Directory preference in ENVI. Only the last step exposes any file parameters so that users can choose where to write the final result; for example:
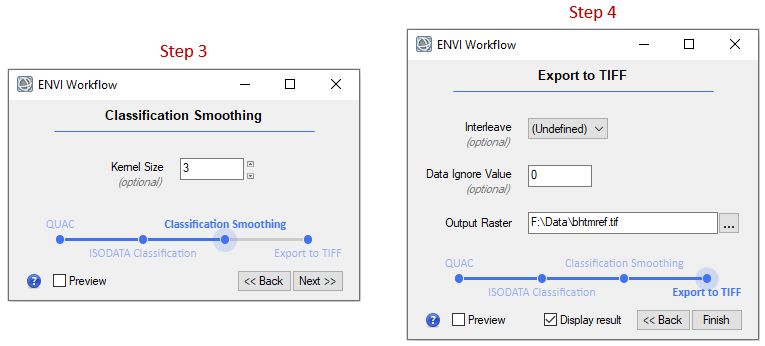
- Similarly, any parameter that is connected to a previous step will be hidden. In this example, the OUTPUT_RASTER in Step 3 is connected to the INPUT_RASTER in Step 4; however those parameters are not exposed in the respective dialogs for each step:
workflow.Connect, step3, 'OUTPUT_RASTER', step4, 'INPUT_RASTER'
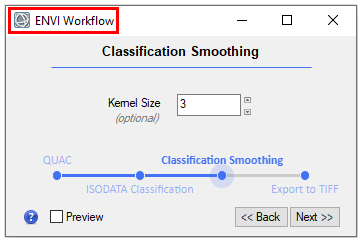
- Each step may have a Preview option. To hide the Preview option in a given step, set the SHOW_PREVIEW property to 0 in the associated ENVIWorkflowStep command; for example:
step1 = ENVIWorkflowStep(SHOW_PREVIEW=0)
step1.TASK = ENVITask('QUAC')
- The final step of a workflow has a Display result option, which is enabled by default. When the workflow finishes, the result will display in an ENVI view. To hide the Display result option in the last step, set the SHOW_DISPLAY_RESULT property to 0 in the associated ENVIWorkflowStep command; for example:
step4 = ENVIWorkflowStep(SHOW_DISPLAY_RESULT=0)
step4.TASK = ENVITask('QUAC')Or, to expose the Display result option in an intermediate step, set SHOW_DISPLAY_RESULT to 1 in the associated ENVIWorkflowStep command:
step2 = ENVIWorkflowStep(SHOW_DISPLAY_RESULT=1)
step2.TASK = ENVITask('ISODATAClassification')
The next section describes other properties that you can set while customizing your workflow.
Customize the Visual Appearance of Workflow Dialogs
When you execute a workflow, each step is presented as a user interface (UI) dialog. These dialogs have a number of visual elements that you can customize.
Workflow Titles
The title of a workflow appears in the title bar of a workflow dialog; for example:
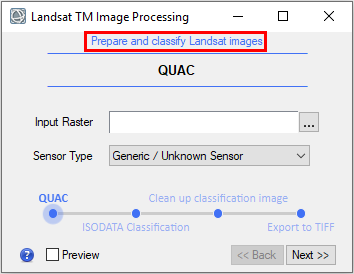
The default title is "ENVI Workflow." To change this, set the TITLE property to a valid string value in ENVIWorkflow:
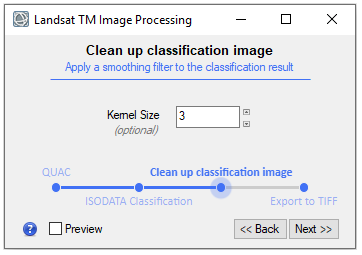
workflow = ENVIWorkflow(TITLE='Landsat TM Image Processing')
Workflow Descriptions
You can add an optional description at the top of a workflow dialog to communicate the purpose or goal of that workflow; for example:
Step Titles
Each step contains a title that is based on the display name of the associated ENVITask. The title appears in boldface at the top of the dialog and also in the timeline:
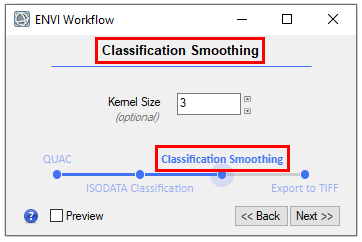
To override the default title, set the TITLE property to a valid string in the associated ENVIWorkflowStep command:
step3 = ENVIWorkflowStep(TITLE='Clean up classification image')
step3.TASK = ENVITask('ClassificationSmoothing')
You can also add a subtitle to any step by setting the SUBTITLE property to a valid string in the associated ENVIWorkflowStep command:
step3 = ENVIWorkflowStep(TITLE='Clean up Classification Image', $
SUBTITLE='Apply a smoothing filter to the classification result')
step3.TASK = ENVITask('ClassificationSmoothing')
Result:
Timelines
A timeline shows your progress in a workflow, relative to all of the steps:
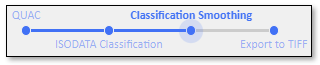
A pulsating dot helps to visualize where you are in the workflow.
To hide the timeline from all workflow steps, set the SHOW_TIMELINE property to 0 in ENVIWorkflow:
workflow = ENVIWorkflow(SHOW_TIMELINE=0)
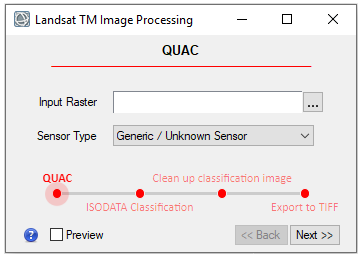
Accent Color
Blue is the default color for accent items such as the timeline and horizontal bar that appears immediately after the title of a step. To change this, set the ACCENT_COLOR property in ENVIWorkflow to a valid color name or red/green/blue (RGB) vector. (See the COLOR property of ENVIROI for a list of valid colors.) For example:
workflow = ENVIWorkflow(ACCENT_COLOR=[255,0,0])
Or:
workflow = ENVIWorkflow(ACCENT_COLOR='red')
Result:
In addition to customizing the visual appearance of workflow steps, you can use callbacks to allow more flexibility and complex logic in your workflow. The next section describes how to do this.
Callbacks
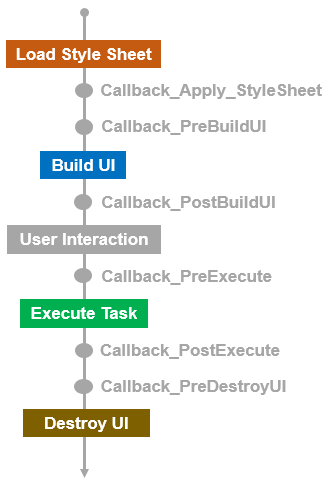
You can add callbacks to your workflow code. Callbacks invoke separate routines (procedures or static methods) at different points within the life cycle of a workflow step. For example, you may want to add some simple logic to a step or hide a step if certain conditions are met.
To add callbacks, first write a separate routine within your workflow program that performs a specific action. Invoke that routine by setting any of the CALLBACK_ properties in ENVIWorkflowStep to the name of the routine. ENVIWorkflowStep has six different CALLBACK_ properties that control when callbacks are invoked throughout the workflow. The following diagram shows where each type of callback belongs within the life cycle of a given step. In each step, ENVI loads the style sheet for the respective task, builds the user interface (UI) dialog for that step, accepts user input, runs the task, and closes (destroys) the UI dialog.
All of the callback routines must accept the workflow object as an argument so that you can manipulate it, if needed, at that point. The only exception to this rule is CALLBACK_APPLY_STYLESHEET, where the argument is a hash with the style sheet that is about to be applied to the task. You can modify the style sheet if needed.
Tip: It is highly recommended to add _REF_EXTRA=refExtra to the declaration statements of your callback routines. In future versions of ENVI, we reserve the right to pass additional keywords. Adding _REF_EXTRA=refExtra will ensure that your code will be compatible with these versions by sending any unused keywords into _REF_EXTRA.
See the following examples:
Custom User Interface Classes (Advanced)
You can create custom UI classes to allow for more complex interactions between workflow dialogs and ENVI functionality.
First, consider using as many predefined UI classes as possible. ENVI and IDL provide a number of predefined UI classes as described in User Interface Elements. For example, ENVIColorTable_UI adds a small color selection tool to your UI:

Another UI class that is helpful for building workflows is IDLContainer_UI. This is a container class that lets you group multiple UI classes in one dialog. See IDLContainer_UI Examples.
You can also combine predefined UI classes with IDL widgets to add more complex logic and functionality to your workflows. Leveraging existing classes and widgets prevents you from having to write a bunch of new code in workflow programs.
A custom UI class must inherit properties and methods from the ENVIParameterUI base class or any of its sub-classes. In addition, the custom UI class must implement one or more of the following methods: BuildUI, GetValue, and SetValue. Furthermore, you must use a style sheet to map UI elements to task parameters.
See the example Custom UI Class Example: Choose Random Input Rasters.
See Also
Creating Workflows, The Basic Structure of a Workflow