You can easily warp an image to a specific map projection using IDL's IMAGE function. This topic shows how to display a simple map image, then explains how to add image registration so that you can warp the image.
The following examples use an image of world cloud data. (This example data is available in the examples/data directory of your IDL installation.)
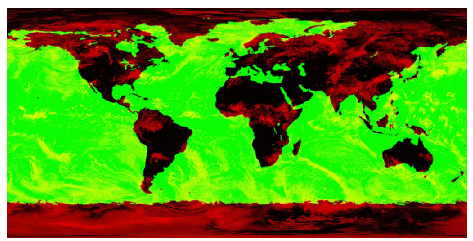
The code shown below creates the graphic shown above. You can copy the entire block and paste it into the IDL command line to run it.
READ_JPEG, FILEPATH('Clouds.jpg', SUBDIR=['examples','data']), clouds
cloudmap = IMAGE(clouds)
Warp the Image to a Map Projection
The next step is to view the data as a map, which warps the image to the map projection you want to use. The following image is the same data warped to the Mollweide map projection:

To make IDL understand that this image is map data, you must register the image, defining the map boundaries, units, location, and dimensions of the image.
READ_JPEG, FILEPATH('Clouds.jpg', $
SUBDIR=['examples','data']), clouds
cloudmap = IMAGE(clouds, $
LIMIT=[-90,-180,90,180], GRID_UNITS=2, $
IMAGE_LOCATION=[-180,-90], IMAGE_DIMENSIONS=[360,180],$
MAP_PROJECTION='Mollweide')
Resources