The IDL IPython Kernel provides the necessary hooks for an IPython (Jupyter) notebook to run IDL code.
Installation
First, install IDL and set up the Python Bridge. Make sure that <IDL_DIR>/lib/bridges is included in the PYTHONPATH environment variable so that Python can find the idl_kernel.py script. You can test this using the following Python command:
>>> from idl_kernel import *
IDL should start up with no errors. If you encounter errors, see Python to IDL Bridge Installation for troubleshooting.
Then install IPython using the instructions for your platform: https://ipython.org/install.html.
For example, if you are using Anaconda or Miniconda, you can install IPython using the following commands:
conda update conda
conda install jupyter
Once IPython (Jupyter) has been installed, you need to install the IDL kernel. The IDL kernel can be found in:
<IDL_DIR>/lib/bridges/kernels/IDL/kernel.json
Depending upon your platform, this file should be installed into one of the following directories.
Note: For all platforms, be sure to create a directory named kernels with a subdirectory named IDL and copy the kernel.json file into that directory.
Windows
To install for all users, copy the kernel.json file to:
%PROGRAMDATA%\jupyter\kernels\IDL\kernel.json
Linux
To install for all users:
/usr/share/jupyter/kernels/IDL/kernel.json
or
/usr/local/share/jupyter/kernels/IDL/kernel.json
To install for a single user on Linux:
~/.local/share/jupyter/kernels/IDL/kernel.json
macOS
To install for all users:
/usr/share/jupyter/kernels/IDL/kernel.json
or
/usr/local/share/jupyter/kernels/IDL/kernel.json
To install for a single user on Macos:
~/Library/Jupyter/kernels/IDL/kernel.json
Environment Variable
For all platforms, instead of copying the kernel.json file, you can define an environment variable:
JUPYTER_PATH = <IDL_DIR>/lib/bridges
where <IDL_DIR> should be changed to your IDL installation directory. If you have ENVI installed, then this lib/bridges directory will be inside the IDL subdirectory.
Usage
Once installed, a type of notebook will be available called IDL.
Start the IPython (Jupyter) notebook interface using the following command from a command shell:
jupyter notebook
This starts your default web browser and loads the main notebook web page, called the "dashboard." Under the New drop-down button, are menu items Python and IDL. Choose IDL to start a new IDL notebook.
A new web browser window or tab appears, containing the IDL notebook. After the IDL kernel has started, you can begin entering IDL commands. All code inside this notebook will be treated as IDL code. To execute IDL commands, type the command into a notebook cell, then press Shift+Enter.
You can enter either single commands or multiple commands within a cell. If you enter multiple commands, the notebook will send each line to IDL as a separate command (although see the Multi-line section below). Any text output from IDL (including error messages) will appear in the "output" cell below the command cell.
You can also enter any "executive" commands such as .RESET or .COMPILE. Note that some commands such as .EDIT will not do anything.
Any graphics created by the notebook will appear inline by default. This includes graphics generated by direct graphics, object graphics (using IDLgrBuffer), and function graphics.
IDL widgets will appear in a separate window, not embedded in the notebook.
Controlling Graphics Output
By default, any graphics created by IDL will be inline (embedded) within the IDL notebook. You can change this behavior by using the %inline and %window magic commands.
For example:
In [0]: %window
In [1]: p = PLOT('r',/TEST)
In [2]: %inline
In [3]: p = PLOT('g',/TEST)
HTML Output
Normally, all IDL output will be sent to the browser as raw unformatted text. Any HTML commands or special escape characters will be ignored and displayed as just text. However, if your IDL output begins with the characters <HTML> then the output for that line will be sent to the browser as HTML.
For example:
In [0]:
s1 = '<html>Here is some <B>BOLD</B> and <i>italic</i> HTML.<br>'
s2 = 'Go to the <a href="https://www.google.com/search?q=idl%20documentation%20center" target="_blank">IDL Documentation Center</a>.'
print, s1 + s2
The IDL notebook displays:
Here is some BOLD and italic HTML.
Go to the Documentation Center on our website.
Here, we display an image using the BUFFER keyword to WRITE_PNG, and base-64 encoding using the IDL_BASE64 function:
In [0]:
lam = Lambda(n,m:Reform(Congrid(255*Randomu(seed,n,n),n*m,n*m),1,n*m,n*m))
WRITE_PNG, '', [lam(15,10),lam(15,10),lam(15,10)], BUFFER=b
img = IDL_BASE64(b)
print,'<html><img src="data:image/png;base64,'+img+'"/></html>'
The IDL notebook displays:

Note: You can also use the %%HTML magic command to include HTML. See Magic Commands below for details.
Multi-line IDL Blocks
By default the IDL notebook executes each line within a cell as a single command.
If you use the IDL continuation character "$" then the notebook will automatically concatenate these lines together and execute it as a single command (see the Examples below).
If the last line in a cell is an END statement, then the IDL notebook will assume that you have a multi-line block of commands. In this case the notebook will compile the entire block as one unit. This allows you to dynamically compile functions and procedures. In addition, if the cell contains a $MAIN program then the notebook will issue a .RUN command to execute the block.
For example, to use a FOR BEGIN/END loop with an IF/THEN block, you could do the following:
In [0]:
for i=1,6 do begin
if i gt 3 then begin
print, i
endif
endfor
end
As another example, we create a function and then use it later:
In [0]:
FUNCTION cubic, X
RETURN, X^3 + (X - 1.0)^2 + 3.0
END
In [1]:
PRINT, QROMB('cubic', 0.0, 3.0)
The IDL notebook displays:
32.2500
We could also combine both cells into a single cell with an END as the last line and the IDL notebook will compile the code and then execute it:
In [0]:
FUNCTION cubic, X
RETURN, X^3 + (X - 1.0)^2 + 3.0
END
PRINT, QROMB('cubic', 0.0, 3.0)
END
Note: When using a multi-line block, the entire cell is executed as a single command. If you create any graphics within that block, only the last graphic will be displayed (unless !MAGIC has been used to turn off embedding).
Magic Commands
You can also use special "magic" commands at the top of a cell to control behavior. Commands that begin with "%" are single line commands, where the rest of the cell is ignored. Commands that begin with "%%" are multi-line commands.
The following commands are available by default:
|
Magic Command |
Description |
|
%%html |
Render the cell contents as a block of HTML
|
|
%%python
>>> |
Execute the cell contents as a block of Python code. The ">>>" is a shorthand form.
|
|
%config
%config property
%config property=value
|
Set various configuration properties. Using %config by itself will print out a list of available properties, while using %config property will print out the current value.
|
|
%inline |
Switch to inline (embedded) mode for IDL graphics
|
|
%lsmagic |
Print out a list of all available magic commands.
|
|
%window |
Switch to separate windows for IDL graphics
|
The magic commands are designed to be extensible. To add your own magic commands, see the idl_magic.py file within the <IDL_DIR>/lib/bridges directory.
Examples
In the IDL notebook, enter the following commands. Be sure to press <Shift>+<Return> to execute the commands within a cell.
In [0]:
arr = Randomu(seed, 1000)
HELP, arr
Out [0]:
ARR FLOAT = Array[1000]
In [1]:
PRINT, MAX(arr), MIN(arr), MEAN(arr)
Out [1]:
0.999996 0.00185713 0.503354
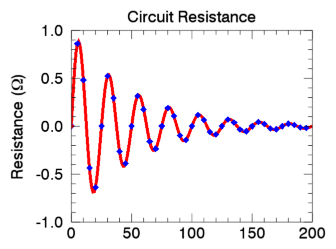
In [2]:
theory = SIN(2.0*[0:199]*!PI/25.0)*EXP(-0.02*[0:199])
p = PLOT(theory, "r4D-", YTITLE='Resistance ($\Omega$)', $
TITLE="Circuit Resistance", DIM=[450,400], MARGIN=0.2)
p.SYM_INCREMENT = 5
p.SYM_COLOR = "blue"
p.SYM_FILLED = 1
p.SYM_FILL_COLOR = 0
Out [2]:
For more examples open the <IDL_DIR>/lib/bridges/IPythonTests.ipynb notebook within the IDL kernel.
Troubleshooting
- If the "jupyter notebook" command fails, make sure that you have installed the latest version of IPython (Jupyter) using the installation instructions.
- If IDL does not appear as a choice in the "New" notebook list, make sure you have copied the kernel.json file into one of the installation directories given above. Make sure that the JSON file is located inside a directory named kernels/IDL.
- If IPython finds the IDL kernel but is unable to start IDL, make sure you have set up the appropriate Python bridge system variables. See the Python Bridge page for details.
Version History
|
8.5 |
Introduced |
|
8.6 |
Add support for multi-line blocks.
Add support for magic commands.
|
See Also
Python Bridge, IDL to Python, Python to IDL