Use the Classification to Vector tool to export selected classes to a vector shapefile.
You can also write a script to perform this step using the ClassificationToShapefile task.
Follow these steps:
- From the Toolbox, select Classification > Post Classification > Classification to Vector. The Data Selection dialog appears.
- Select an input classification image and perform optional spatial subsetting and masking, then click OK. The Convert Classification to Vector dialog appears.
- The Export Classes section contains a list of individual class names that were imported. Optionally choose one of the following from the Output Method drop-down list:
- Single Vector Layer (default): Create one shapefile that contains all classes.
- One Vector Layer per Class: Create multiple shapefiles, one per class.
- Specify the path and filename for the output shapefile in the Output Vector field. If you selected the One Vector Layer Per Class option in the previous step, ENVI will create multiple shapefiles and will automatically append the class names to the root filename.
-
To reuse these task settings in future ENVI sessions, save them to a file. Click the down arrow next to the OK button  , select Save Parameter Values, then specify the path and filename to save to. Note that some parameter types, such as rasters, vectors, and ROIs, will not be saved with the file. To apply the saved task settings, click the down arrow and select Restore Parameter Values, then select the file where you previously saved your settings.
-
You can run the process in the background on your computer or in the background on an ENVI Server (if available). Click the down arrow next to the OK button and select one of the following:
- Run Task in the Background: Runs the process on your computer. This method does not use an ENVI Server. The job progress will show in the ENVI Job Console's Background Jobs tab.
- Run Task on envi_server_name. Runs the process on the selected ENVI Server. The job progress will show in the ENVI Job Console's envi_server_name tab.
See ENVI Job Console for details on monitoring ENVI Server jobs and viewing results. See ENVI Servers for details on configuring and using an ENVI Server.
-
Click OK.
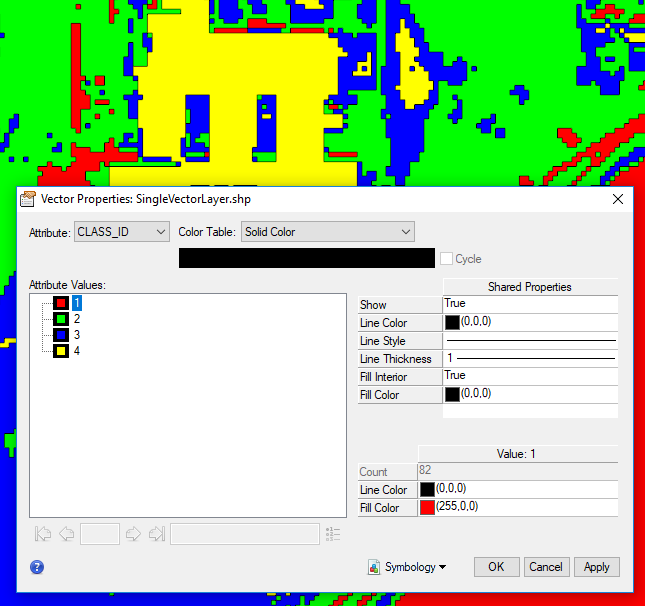
If you created one shapefile that contains all classes, that shapefile is added to the Data Manager and Layer Manager, and it appears in the Image window. Double-click the shapefile in the Layer Manager to display the Vector Properties dialog, then assign unique colors and line properties to the individual classes as needed. The following image shows an example of this step for a single shapefile with four classes:
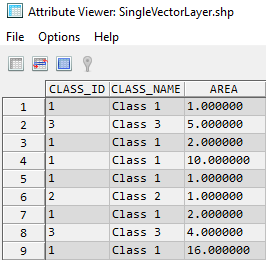
If you right-click on the shapefile in the Layer Manager and select View Attributes, the Attribute Viewer lists individual polygon records for the different classes, organized by the CLASS_ID and CLASS_NAME attributes; for example:
If you created multiple shapefiles (one per class), the results are not added to the Data Manager or Layer Manager. You must open them manually in ENVI. Double-click each shapefile in the Layer Manager to display the Vector Properties dialog, then assign unique colors and line properties to the individual classes.
See Also
Classification to Pixel ROI, Classification to Polygon ROI, Convert Classic ROIs to Shapefiles