This section describes how to save image data to various file formats, how to create screen captures of all layers displayed in the current view (called chipping), and how to export the view to various formats. See the following sections:
Save
Use the File > Save option to save changes to layers that have been edited, such as vectors, ROIs, and annotations.
Save Raster As (ENVI, NITF, TIFF, DTED)
Use File > Save As > Save As (ENVI, NITF, TIFF, DTED) to save image data to ENVI, NITF, TIFF, or DTED formats.
You can also write a script to export files to these formats (except DTED) using the following tasks:ExportRasterToENVI, ExportRasterToNITF20, ExportRasterToNITF21, ExportRasterToNSIF10, and ExportRasterToTIFF.
ENVI does not retain display enhancements for images when you use Save As. These include rotating, zooming, contrast, brightness, sharpening, stretching, Portals, or viewing multiple layers. Use the File > Chip View To options to retain display enhancements, which is described later in this topic.
If an image contains both standard and Rational Polynomial Coefficient (RPC) spatial references, the RPC information will not be written to the file header upon saving to ENVI format.
Also use this menu option to save vector layer changes to a shapefile (.shp). The vector layer must be the active layer, and it must have been modified.
- From the menu bar, select File > Save As > Save As (ENVI, NITF, TIFF, DTED). The Data Selection dialog appears.
- Select an input file and perform optional subsetting and masking, then click OK. The Save File As dialog appears.
- Select a format from the Output Format drop-down list. The following options are available:
- NITF: NITF 2.0 and 2.1 or NSIF 1.0. If you select this option, the Compression drop-down list appears. See Save NITF Files for further details and instructions.
- ENVI: ENVI writes the data to ENVI image format and creates and saves an associated header file (.hdr) to disk. This option is disabled for input NITF files with multiple image segments.
- TIFF: TIFF and GeoTIFF. This option is disabled for input NITF files with multiple image segments.
- DTED: Digital Terrain Elevation Data. This option is disabled for input NITF files with multiple image segments.
- Enter a Data Ignore Value, which is the pixel value that ENVI should ignore when processing data or computing statistics from the image you are saving. Click the Find Suitable Data Ignore Value button
 to automatically determine a suitable value to use based on the image statistics and data type. After the image has been saved and redisplayed, pixels with the specified data ignore value will be transparent in the view and marked as NoData.
- Click the Browse button to open the Select Output Filename dialog and choose an output destination and filename. Click Open accept the output file settings.
- Enable the Display result check box to display the output in the view when processing is complete. Otherwise, if the check box is disabled, the result can be loaded from the Data Manager.
- Click OK.
Save Raster As ASCII
This option saves raster data to ASCII (.txt) files that contain the digital number (DN) values for every pixel. If you output multiple bands, the file interleave is the same as the input file. The format of the ASCII file is that of a 2D array.
- From the menu bar, select File > Save As > Save Raster As ASCII. The Output File to ASCII Input Filename dialog appears.
- Select a file and perform optional spatial subsetting, then click OK. The Output to ASCII Parameters dialog appears.
- Enter an integer value for Total Field Size to set the total number of characters in the field.
- To set the number of digits that follow the decimal point in the output data, enter a value for Decimal Precision.
- Enter an output filename and directory, then click OK
Save Raster As ArcView Raster
This option saves output data to ArcView raster (.bil) format file, including the associated .hdr and .stx files. The output file does not contain datum and ellipsoid information.
- From the menu bar, select File > Save As > Save Raster As ArcView Raster. The Output ArcView Input Filename dialog appears.
- Select an input file and perform optional spatial and spectral subsetting, then click OK. The Output File to ArcView dialog appears.
- Enter an output filename and directory, then click OK.
Save Raster As CADRG
This option saves raster data to Compressed ARC Digitized Raster Graphics (CADRG) format. You must have a ENVI NITF Module license to write to CADRG format.
You can also write a script to export files to CADRG format using the ExportRasterToCADRG task.
- From the menu bar, select File > Save As > Save Raster As CADRG. The Select RFP Output File dialog appears.
- Select an input file and perform optional spatial subsetting, then click OK. The RPF (CADRG) Output Parameters dialog appears.
- Enter an output directory.
- Select a Resolution from the drop-down list.
- Select a Classification, Country Code, Release Marking, and Producer code option from the drop-down lists provided.
- The Originating Station ID and Originator's Name fields are automatically populated with the values (with the same names) from the nitf.cfg file located in the \classic\menu folder of the ENVI installation path. You can override these as needed. The first field is the station ID of the organization in which the image originated. The second field is the image originator name.
- Click OK. ENVI creates an RPF directory containing the A.TOC file and a subdirectory under RPF containing the output.
Note: You can customize the country code, release marking, and producer code drop-down lists by editing the rpf_countries.txt, rpf_release.txt, and rpf_producer.txt files located in the menu directory of your ENVI installation.
Save Raster As CIB
This option saves raster data to Controlled Image Base (CIB) format. You must have a ENVI NITF Module license to write to CIB format.
- From the menu bar, select File > Save As > Save Raster As CIB. The Select RPF Output File dialog appears.
- Select an input file and perform optional spatial subsetting, then click OK. The RPF (CIB) Output Parameters dialog appears.
- Enter an output directory.
- Select a Resolution from the drop-down list.
- Select a Classification, Country Code, Release Marking, and Producer code option from the drop-down lists provided.
- Click OK. ENVI creates an RPF directory containing the A.TOC file and a subdirectory under RPF containing the output.
Note: You can customize the country code, release marking, and producer code drop-down lists by editing the rpf_countries.txt, rpf_release.txt, and rpf_producer.txt files located in the menu directory of your ENVI installation.
Save Raster As Cloud Optimized GeoTIFF
This option saves raster data to Cloud Optimized GeoTIFF (.tif ) format. This is a good option if you will host the file for HTTP access in a cloud environment. Its structure allows for efficient streaming of data. Cloud Optimized GeoTIFF files are backwards compatible with any software that can read local GeoTIFF files.
You can also write a script to export rasters to Cloud Optimized GeoTIFF using the ExportRasterToCOG task.
- From the menu bar, select File > Save As > Save Raster As Cloud Optimized GeoTIFF. The Save Raster As Cloud Optimized GeoTIFF dialog appears.
- Select an Input Raster and perform optional spatial and spectral subsetting.
- Optional: Enter a Data Ignore Value, which is the pixel value that ENVI should ignore when processing data or computing statistics from the image you are saving. If you do not specify a value and the input raster already has a data ignore value defined, that value will be used in the output file.
- Select a Compression Type. The choices are:
- Deflate:: More efficient than LZW but may cause compatibility issues with some software packages
- JPEG: For 8-bit (byte) data only
- LERC
- LERC Deflate
- LZW
- None (default)
All options except for JPEG can be used for lossless compression. JPEG can be used for lossy compression.
- Select an output Interleave. The choices are:
- BIP: Band-interleaved-by-pixel (default)
- BSQ: Band sequential
- Choose an option from the Tile Matrix Set drop-down list. A tile matrix set is an Open Geospatial Consortium (OGC) standard for defining the projection, scaling, and size of individual tiles. For more information, see the OGC Two Dimensional Tile Matrix Set document. The choices are:
- Google Maps Compatible: Choose this option when creating Cloud Optimized GeoTIFF files for map services such as Google Maps.
- Optimized: Choose this option in all other cases. It converts the input raster into a Cloud Optimized GeoTIFF file using 512 x 512 pixels, which provides the best performance in most cases.
- Enter a filename and location for the Output Raster.
- Enable the Display result check box to display the output in the view when processing is complete. Otherwise, if the check box is disabled, the result can be loaded from the Data Manager.
- Click OK.
Save Raster As ER Mapper
This option saves raster data to ER Mapper format, including required header fields, a bad bands list, band names, and map information or pixel sizes. ER Mapper files are output in a UTM projection only.
- From the menu bar, select File > Save As > Save Raster As ER Mapper. The Output to ER Input Filename dialog appears.
- Select an input file and perform optional spatial and spectral subsetting, then click OK. The Output File to ER Mapper dialog appears.
- Enter an output filename and directory, then click OK.
Save Raster As ERDAS IMAGINE
This option saves raster data to ERDAS IMAGINE (.img) format. ENVI saves the following file attributes when saving a file in IMAGINE 8.x format:
- Map information
- Class colors and names for classification images
- Spatial and spectral subsets
- NaN values
- Unrestricted numbers of samples, lines, or bands
- Data type: unsigned byte, integer, unsigned integer, long integer, unsigned long integer, floating-point, double-precision floating point, complex, and double-precision complex
Follow these steps to save files to IMAGINE format:
- From the menu bar, select File > Save As > Save Raster As Erdas Imagine. The Select File for ERDAS IMAGINE Output dialog displays.
- Select an input file and click OK. The ERDAS IMAGINE Output Parameters dialog appears.
- The Block Width and Block Height fields default to an optimized block size (in pixels) for writing. You can change the default values as desired, especially if you want to specify the optimal ERDAS block size (64 by 64 pixels). The input image can be any interleave type, but the image is written as block band sequential (BSQ) interleave.
-
Blocks are similar to tiles used by ENVI to manage data. The size of the block dictates how much image data is processed at one time. Smaller block sizes may result in slower writing performance.
-
The Enter Output IMAGINE Filename field defaults to the root filename, but uses the .img extension for the IMAGINE format. You can change the path and filename.
-
You can assign any name to the file, but it must have the .img extension. If the file size is greater than the 2 GB limit, a second file using the root name and the .ige extension is automatically generated in the same directory as the .img file.
Note: If the filename contains a character that is not valid for the ERDAS filename convention, it is changed to an underscore character (_) when the file is saved.
-
Click OK.
Save Raster As JPEG2000
This option saves raster data to JPEG2000 (.jp2) format.
- From the menu bar, select File > Save As > Save Raster As JPEG2000. The Export to JPEG2000 dialog displays.
- Select an Input Raster.
- Use the Compression drop-down list to specify the output compression type:
- Lossless (default): A completely reversible compression that produces a high-quality result. Less data content is compressed than with Low or High compression.
- Low: A non-reversible compression that retains nearly all the original data content while maintaining moderate compression.
- High: A non-reversible compression that provides the highest level of data content compression, while potentially producing a lower-quality result
- In the Output Raster field, enter an output filename and directory.
-
Enable the Display result check box to display the output in the view when processing is complete. Otherwise, if the check box is disabled, the result can be loaded from the Data Manager.
- Click OK. ENVI creates a JPEG2000 file (.jp2) that is optimized for visual performance.
Save Raster As KMZ
This option saves a raster and its footprint to Google Earth's KMZ (Keyhole Markup Language Zipped) format.
You can also write a script to export files to KMZ format using the ExportRasterToKMZ task.
- From the menu bar, select File > Save As > Save Raster As KMZ. The Export Raster As KMZ dialog appears.
- Select an input file and perform optional spatial and spectral subsetting, then click OK.
- In the Outline Thickness field, set the width of the footprint outline, in pixels.
- Select the Footprint Color from the color picker.
- For the Fill Footprint field, select Yes or No.
- Set the Footprint Transparency by using the slider bar, or enter a value in the field provided.
- Enter an filename and directory in the Output KMZ URI field, then click OK.
Save Raster As PCI
This option saves raster data to a PCI file (.pix), including required header fields, band names, a bad bands list, and map information or pixel sizes.
- From the menu bar, select File > Save As > Save Raster As PCI. The Output to PCI Input Filename dialog appears.
- Select an input file and perform optional spatial and spectral subsetting, then click OK.
- Enter an output filename and directory, then click OK.
Save Vector As
This option saves an open .shp or .evf vector file to a new filename.
- From the menu bar, select File > Save As > Save Vector As. The Data Selection dialog appears.
- Select an input vector file, then click OK. The Save As dialog appears.
- Enter an output filename and directory, then click OK.
Save Vector As GeoJSON
This option saves one or more vectors to a GeoJSON file format.
You can also write a script to export vectors to GeoJSON using the ExportVectorToGeoJSON task.
- From the menu bar, select File > Save As > Save Vector As GeoJSON. The Export Vector as GeoJSON dialog appears.
- Select an Input Vector file and click OK. For supported formats, see Vector Formats.
- Click the Browse button
 next to the Input Vectors field. The Data Selection dialog appears.
- Select the vector(s) you want to save to GeoJSON file format (use Ctrl+click or Shift+click to multi-select).
- In the Output GeoJSON, enter the path and filename for the GeoJSON file.
- The default for Pretty Print is Yes which will produce a human-readable (larger) GeoJSON file. To produce a small GeoJSON file, select No.
-
Enable the Display result check box to display the output in the view when processing is complete. Otherwise, if the check box is disabled, the result can be loaded from the Data Manager.
-
Click OK.
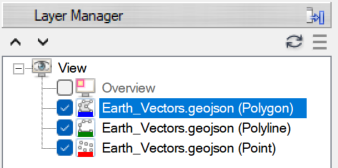
When you open the GeoJSON file in ENVI, all points will be contained in a Point layer, polylines in a Polyline layer, and polygons in a Polygon layer.
Save Vector As KML
This option saves a vector to KML (Keyhole Markup Language) or compressed KMZ (Keyhole Markup Language Zipped).
You can also write a script to export vectors to KML/KMZ format using the ExportVectorToKML task.
- From the menu bar, select File > Save As > Save Vector As KML. The Export Vector as KML/KMZ dialog appears.
- Select an Input Vector file and click OK. For supported formats, see Vector Formats.
-
From the Format drop-down list, select one of the following formats to save to:
-
In the Name Field, enter the name for the KML Placemark. The default is name.
- Enter an output filename and directory in the Output KML/KMZ URI field, then click OK.
Save Annotation As ANZ
This option saves a new annotation layer to an .anz file. It can also be used to save an open annotation file to a new filename.
- From the menu bar, select File > Save As > Save Annotation As ANZ. The Data Selection dialog appears.
- Select the annotation to save, then click OK.
- Enter an output filename and directory, then click OK.
Chip the View
Use the File > Chip View To options to create a screen capture of all layers displayed in the current view. Any display enhancements, zooming, rotating, or Portals that are displayed in the view are burned into the output image. ENVI creates an 8-bit, three-band image at screen resolution, even if the input data is a only single vector layer or consists of one band (a grayscale image).
You must display the layer(s) in the current view prior to using Chip View To options. The menu options are disabled if you do not have any layers displayed. You can display any combination of image and/or vector layers for a chip.
Chip to a File
You can also write a script to chip the contents of a view to a file using the ENVIView::ChipToFile method.
- Display the layer(s) you wish to chip in the Image window. You can use the Zoom, Pan, or enhancement tools to customize the display. The layers must be oriented with North up. For images that are not georeferenced, you must establish a base projection. For example, to chip an image with RPC information to Geospatial PDF, you can use a DEM to establish a base projection.
- From the menu bar, select File > Chip View To > File or click the Chip to File button on the toolbar. The Chip to File Parameters dialog appears.
- Select an output format from the Output File drop-down list. The following options are available:
-
NITF: NITF 2.0 and 2.1 or NSIF 1.0. If you select this option, the Compression drop-down list appears. See Save NITF Files for more information about the available options. If you select the Metadata Editor button, you can optionally edit some NITF metadata fields and add PIA tags and text segments before saving the file.
Note: You will lose all NITF metadata if you use Chip View to > File. Default metadata values will be used based on NITF preferences. To save metadata, use File > Save As to create output instead.
- ENVI: ENVI image format. When you select this option, ENVI creates and saves an associated header file (.hdr) to disk.
- TIFF: TIFF and GeoTIFF
- JPEG: JPEG
- JPEG2000: JPEG2000
- Click the File Select button
 to open the Select Output Filename dialog and choose an output destination and filename. Click Open to accept the output file settings.
- Click OK.
Chip to ArcGIS Pro
This option is available on Windows platforms with a licensed ArcGIS Pro installation. It is not available when the view is divided into multiple views.
You can send a chipped image display from ENVI to ArcGIS Pro. The image you send to ArcGIS Pro will retain all display enhancements and annotations you added in ENVI. Use the following steps:
- From the menu bar, select File > Chip View To > ArcGIS Pro.
- If ArcGIS Pro is not already running, ENVI will initiate it. The dataset will automatically display in ArcGIS Pro with default enhancements, and it will be added as a new layer to the ArcGIS Pro table of contents.
- If one or more instances of ArcGIS Pro is already running, an ArcGIS Pro Instances dialog appears. Select an instance to display your dataset, or start a new instance of ArcGIS Pro software. Click OK.
Chip to Google Earth
- Display the layer(s) you wish to chip in the Image window. You can use the Zoom, Pan, Rotate, or enhancement tools to customize the display.
- From the menu bar, select File > Chip View To > Google Earth. If you have not yet started Google Earth, it will automatically start. If you do not have Google Earth installed, or if you are on a non-Windows platform, ENVI will create a KML file in the directory specified in the Temporary Directory preference.
- You can save the generated image as a KML or KMZ file from Google Earth; be sure to do this before closing ENVI.
Chip to Geospatial PDF
This option is available on Windows 64-bit and Linux 64-bit platforms. It creates a screen capture of all georeferenced data layers displayed in the current view to a Geospatial PDF file. Any display enhancements, zooming, or Portals that are displayed in the view are burned into the PDF document. A Geospatial PDF document is georeferenced, allowing you to obtain latitude and longitude coordinates, measure distances, mark and copy location coordinates.
- Display the layer(s) you wish to chip in the current view. You can use the Zoom, Pan, or enhancement tools to customize the display. The layers must be oriented with North up. In addition, a standard base projection must be established.
- From the menu bar, select File > Chip View To > Geospatial PDF to export the chipped image display to Geospatial PDF.
- In the Chip to Geospatial PDF dialog, enter a an output filename and any of the following information you want to save to the PDF Properties and click OK.
- Title
- Author
- Subject
- Keywords
You can open the output PDF file in Adobe Acrobat Reader or use Adobe Acrobat Pro for more options, including viewing latitude and longitude coordinates, measuring distances, and marking and copying location coordinates. For more information, see the Adobe website at www.adobe.com.
Chip to PowerPoint
This option is available on Windows 64-bit platforms with the PowerPoint software installed. You can chip one or more views to PowerPoint using predefined templates or no templates. See the Chip Views to PowerPoint topic for instructions.
Export View to Geospatial PDF
This option is available on Windows 64-bit and Linux 64-bit platforms. You can export one or more georeferenced raster layers displayed in the current view to a Geospatial PDF file. It does not retain vector layers, nor does it retain any image rotation or sharpening.
A Geospatial PDF document is georeferenced, allowing you to obtain latitude and longitude coordinates, measure distances, and mark and copy location coordinates.
- Display the layers you wish to export in the current view. A standard base projection must be established.
- From the menu bar, select File > Export View To > Geospatial PDF.
- Select All Layers in View to include ENVI layers that have been unchecked in the Layer Manager and are not displayed in the current view. These hidden layers must be enabled within the PDF viewer to be visible. Select Visible Layers Only to export only those ENVI layers displayed in the current view.
- The default image resolution (in pixels per inch) is displayed in the Limit Resolution To field. You can enter a different value if necessary.
- The default page size (in inches) is displayed in the Width and Height fields. You can enter a different value in one of these fields if desired, then press the Enter key. The other field will update automatically to maintain the correct aspect ratio.
- Enter an output filename and any of the following information you want to save to the PDF Properties.
- Title
- Author
- Subject
- Keywords
- Click OK to export the image to a Geospatial PDF document.
You can open the output PDF file in Adobe Acrobat Reader or use Adobe Acrobat Pro for more options, including viewing latitude and longitude coordinates, measuring distances, and marking and copying location coordinates. For more information, see the Adobe website at www.adobe.com.
Example
Suppose the current view contains two raster layers:
- The current view size is 800 by 800 pixels.
- The first raster layer is 7400 x 7400 pixels.
- The second layer is 1103 x 1103 pixels.
- The page Width and Height are set in inches, proportional to the view dimensions, at a default resolution of 150 pixels per inch (800 / 150) x (800 / 150) = 5.333 x 5.333 inches.
- You increased the default resolution from 150 to 300 pixels per inch.
The first raster image's width and height in inches are calculated based on the percentage of the view covered by the image. The current resolution of the first raster layer is then calculated by dividing its pixeldimensions by its physical dimensions (inches).
Since the image covers 100% of the view, the width and height in inches are 5.333 x 5.333. The current resolution is (7400 / 5.333) x (7400 / 5.333) = 1387 pixels per inch. Since this value is greater than the resolution that you selected, the image will be down-sampled by a proportion equivalent to a resolution of 300 pixels per inch. Up-sampling is not available.
Export View to Image File
This option exports all contents of a view to an RGB 24-bit image file. Even if a panchromatic image is displayed in the view, the output will have three bands (red, green, blue). The output image preserves any vector layers, annotation layers, feature counting layers, raster color slices, and image enhancements. It does not preserve any north arrows or cursor probe (crosshairs).
If the view contains a standard base map projection, the output file will be georeferenced to that projection.
This tool is similar to Chip to File except that you can select the output zoom factor and it saves the entire image layer, not just what is displayed on the screen.
You can write a script to export the view to an image file using the ENVIView::Export method.
To save a full-resolution raster to PNG format, write an ENVI API script that uses the ExportRasterToPNG task.
- Display the layers you wish to export in the current view.
- From the menu bar, select File > Export View To > Image File. The Export View to Image File dialog appears.
- Choose an Output Extent. The choices are:
- Current (default): Exports the contents of the current view extent.
- Full: Exports the entire dataset extent, not just what is displayed in the view.
- The following options define the pixel resolution of the output image. Setting one value will automatically update the other two values. The choices are:
- Zoom Factor: Enter a floating-point value. This field allows for more precision than the Map Scale field.
- Map Scale: Enter a denominator value, for example 24000 for a 1:24000 map scale. This field is enabled when a raster layer is georeferenced to a standard map projection.
- Pixel Size: Enter an integer value indicating the output pixel size.
- Select an Output Format. The choices are ENVI or TIFF.
- Enter an Output Filename.
- Enable the Display result check box to display the output in the view when processing is complete. Otherwise, if the check box is disabled, the result can be loaded from the Data Manager.
- Click OK to export the image to disk. On Linux systems, make sure that the view is not obstructed by another dialog or window during the export process.
Tip: If you find a zoom level that you like in the display and you want to match this zoom level in the output raster, select Use Map Scale from the zoom drop-down list in the menu bar. Note the map scale that is displayed, then enter this value in the Map Scale field in the Export View to Image File dialog.
Export Layer to TIFF
This option exports a raster layer displayed in the current view to a TIFF file. It saves the full raster layer extent, with image enhancements, at full resolution.
Note: Sharpening is not preserved upon export. To export a raster layer with sharpening, use Export View to Image File to export only the displayed raster layer.
You can also write a script to export the raster layer of a view to a TIFF file using the ENVIRasterLayer::Export method.
- Display the layer you wish to export in the current view. A standard base projection must be established.
- Right-click the layer in the Layer Manager, and select Export Layer to TIFF. The Export Layer to TIFF dialog appears.
- Enter an Output Filename.
- Enable the Display result check box to display the output in the view when processing is complete. Otherwise, if the check box is disabled, the result can be loaded from the Data Manager.
- Click OK to export the image to a TIFF file.
See Also
Save and Restore Sessions, Save NITF Files, Chip ENVI Views to PowerPoint, Supported Data Types, Getting Started with ENVI Tutorial