In this tutorial, you will use the Image Registration workflow to geometrically align two overlapping images. The images have different viewing geometry and different terrain distortions. You will align them into the same coordinate system so that corresponding pixels represent the same objects.
Files Used in this Tutorial
Tutorial files are available from our ENVI Tutorials web page. Click the Image Restistration link to download the .zip file to your machine, then unzip the files. You will use these files in the tutorial:
|
File |
Description |
|
ikonos_4.0m.dat
|
IKONOS true-color image of Boulder, CO, at 4 meter spatial resolution
|
|
ikonos_4.0m.hdr
|
Header file for above
|
|
quickbird_2.4m.dat
|
QuickBird true-color image of Boulder, CO, at 2.4 meter spatial resolution
|
|
quickbird_2.4m.hdr
|
Header file for above
|
Performing Automatic Registration
In the following steps, you will perform image registration by selecting base and warp images, setting parameters to generate tie points, reviewing and editing those tie points, and generating an aligned output image.
Select Base and Warp Images and Set Parameters
- Start ENVI.
- From the Toolbox, select Geometric Correction > Registration > Image Registration Workflow. The File Selection panel appears.
- In the File Selection panel, click Browse next to the Base Image File field. Navigate to the directory where you saved the tutorial data, and select the quickbird_2.4m.dat file. Click OK.
- In the File Selection panel, click Browse next to the Warp Image File field. Navigate to the directory where you saved the tutorial data, and select the ikonos_4.0m.dat file. Click OK.
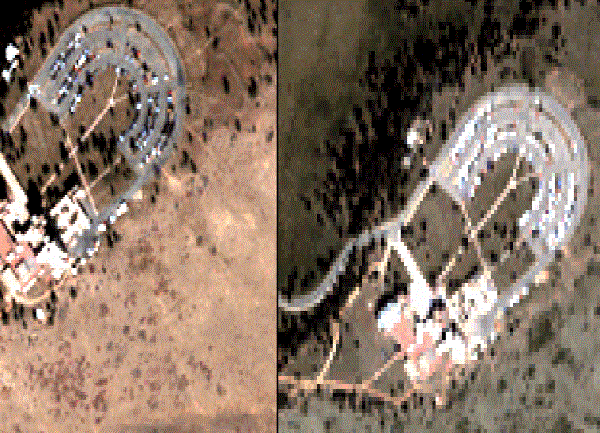
- Click Next to proceed to the Tie Points Generation panel. Two separate views are created. The left view contains the base image (quickbird_2.4m.dat), and the right view contains the warp image (ikonos_4.0m.dat). The views are geographically linked; when you explore one view, the other view updates automatically. The following figure shows the side-by-side images zoomed out to their full extent:
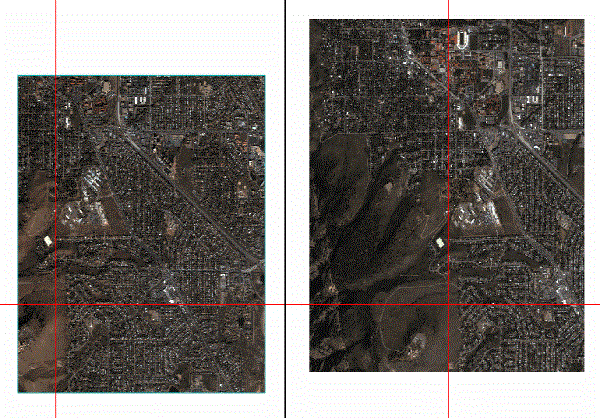
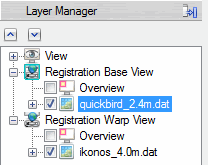
The Layer Manager lists both views:
The Tie Points Generation panel is where you specify the parameters for automatic tie point generation. You could create seed tie points in this panel, though they are not needed for this tutorial. Seed tie points are recommended only if the images have poor or no georeferencing. If only one image has poor georeferencing and the other image does not, use the image with accurate georeferencing as the base image. If the warp image is pixel based, arbitrary, or a pseudo projection, you need to add or import at least three seed tie points before you continue.
- Keep the default parameter settings in the Main tab and Advanced tab. You will not need to use the Seed Tie Points tab because this dataset has good georeferencing.
- Click Next to automatically generate tie points and to proceed to the Review and Warp panel.
Review Generated Tie Points
When automatic tie point generation is complete:
- The Review and Warp panel appears.
- The base image in the left view contains green-colored tie points.
- The warp image in the right view contains magenta-colored tie points.
- The Cursor Value tool appears.
The table in the Review and Warp panel lists the details of all generated tie points, such as their pixel coordinates on the base and warp images, and their SCORE and ERROR values. The total root mean square (RMS) error displays at the bottom of the table.
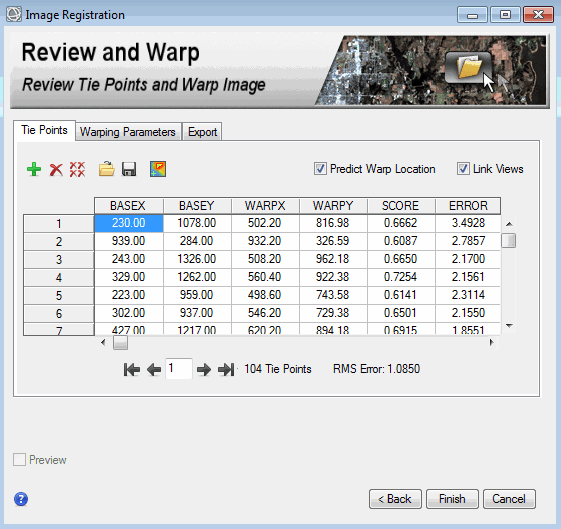
The SCORE is from automatic tie point generation. A patch around the tie point location is used as a matching window. Depending on the matching method you choose, the normalized cross-correlation or normalized Mutual Information between the window in the base image and the window in the warp image is computed as the matching score.
The ERROR measurement represents the distance of each tie point in the warp image to its predicted location, in pixel units. If the base and warp image do not have RPC map information and an associated DEM, a first-order polynomial transform is used to compute the predicted location from tie points on the base image to points on the warp image. If the base image or warp image have RPC map information and you specified a DEM file earlier, ENVI performs a quick orthorectification on the base and warp image, resulting in a more accurate image registration. Higher errors may indicate bad tie points or an inappropriate geometric model used. It does not necessarily reflect the positional errors in the tie points.
You can click the Show Error Overlay button  in the Review and Warp panel to overlay a transparent color gradient that shows the relative error magnitudes of your tie points.The Error Overlay is based on ERROR values in the Tie Points Attribute Table. The ERROR measurement reflects the quality of fitting to the first-order polynomial math model. Higher errors may indicate bad tie points or an inappropriate geometric model used. It does not necessarily reflect the positional errors in the tie points.
The best way to check the accuracy of the tie points is to visually examine their placement in the Image window. The ERROR measurements are updated if you add or delete tie points.
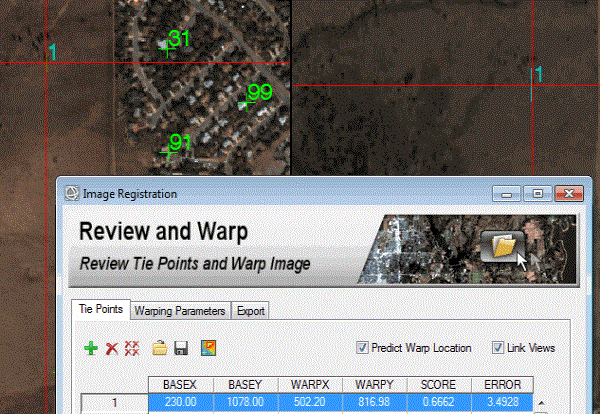
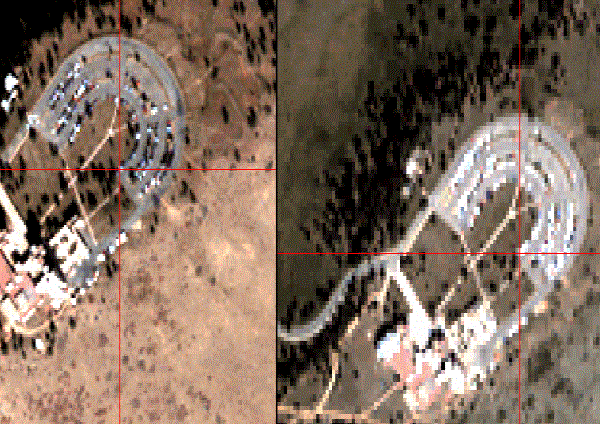
Click a row label (1, 2, etc.) or use the arrow buttons to select a record in the table. Crosshairs from the Cursor Value tool mark the location of that tie point, and both views are centered at the selected tie point; for example:
You can use keyboard keys to navigate the table rows (Windows platform only), or click the appropriate button:
- Click the up or down arrow key, or click the
 or
or  button to select the previous or next record in the table.
- Click the Home or End key, or click the
 or
or  button to select the first or last record in the table.
- Enter a value in the Go To field (between the buttons), then press the Enter key to go to a specific tie point.
- Click the Delete key, or click the
 button to delete the selected record.
Follow these steps to review the tie points:
-
Click the ERROR column to select it, then right-click and select Sort By Selected Column Reverse. The tie points with the highest error appear at the top of the table. You will visually examine the tie points with the highest error.
-
Select the row of the first tie point listed in the table. Both views move to that tie point location. If needed, zoom in to see the image detail.
Tip: If an image is too dark, select its filename in the Layer Manager and select a different stretch type option in the toolbar (for example, Linear 5%).
-
Check to see if the placement accuracy of the tie point is good.
The tie points above appear to have good accuracy.
Though it is not necessary for this tutorial, you can also sort the tie points by matching score. Click the SCORE column to select it, then right-click and select Sort By Selected Column Forward. The tie points with the lowest score appear at the top of the table.
-
Check the accuracy of other tie points by selecting the appropriate tows in the table. If you find tie points that do not have good accuracy, you can delete them so they will not be included in the warping process and affect the accuracy of the image registration.
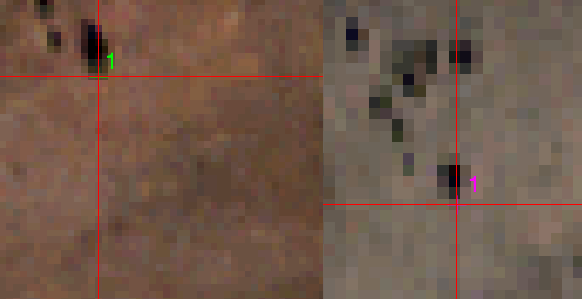
The following is an example of what tie points with poor accuracy might look like:

You cannot interactively move tie points in the Image Registration workflow. You can only add or remove tie points to try to improve the overall RMS error.
- Select row 2 in the table.

- Click the Delete Tie Point button. The RMS Error decreases slightly.
If you pan the image to the mountainous areas in the lower-left side of the image, you will notice that fewer tie points were automatically generated in this area. This is because of the terrain relief. You should add multiple tie points to this area to improve the registration result.
- Pan to the parking lot in the lower-left corner of the images.
- In the left view (base image), click on a location within the parking lot. The crosshairs move to that pixel location. Notice how the crosshairs in the right view automatically move to approximately the same location in the warp image. This is because the Predict Warp Location option is enabled in the Review and Warp Panel. When you select a pixel in the base image, ENVI uses an image-matching technique to predict the corresponding pixel in the warp image.
- If the selected point looks reasonable in both images, click the Add Tie Point button to add a tie point to that location. Did the RMS Error increase or decrease with the new tie point? If the error is worse, you can delete the tie point and try a different location.
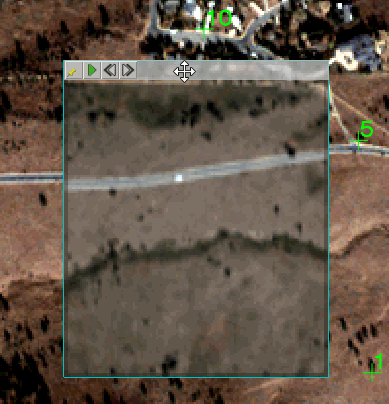
- Enable the Preview option. A Preview Window appears in the base image so that you can preview how the warped image will look, compared to the base image. The Preview option is helpful for seeing how the warp image will appear when you change warping parameters.
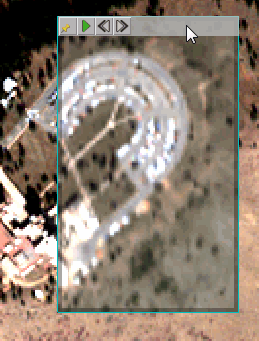
- Move the Preview window over a road, then click the Play button
 in the Preview window toolbar. The Preview window flickers between the base image and warp image. Click the Pause button
  to stop the flicker.
- Click the Warping Parameters tab.
- From the Warping Method drop-down list, select Triangulation. The Preview window updates to show the new warp image result.
- Move the Preview Window to the parking lot area to see how the registration improves with Triangulation. This warping method works well in areas where tie points exactly match between the base image and warp image.
- Experiment with other warping parameters, and use the Preview Window to see how the warp image result will appear.
- When you are satisfied with the RMS Error (a value close to 1.0 is good), click the Save Tie Points button. Select an output directory to save the tie points.
Export the Warped Image
- Click the Export tab.
- Provide an output directory and filenames for the Export Warped Image and Export Tie Points to ASCII outputs.
- Click Finish to generate the output image and complete the workflow. ENVI loads the warped image into the Layer Manager.
- Exit ENVI.
References:
Jin, Xiaoying. ENVI automated image registration solutions. NV5 Geospatial Solutions, Inc. whitepaper (2017). ENVI automated image registration solutions can be downloaded from our website.
Jin, Xiaoying, and Robert Schafer. Method and system for automatic registration of images. Exelis, Inc., assignee; now owned by NV5 Global, Inc. U.S. Patent No. 9,245,201 (issued January 26, 2016).