You can build a temporal cube, which is a multiband raster where each band represents a different date/time of the same geographic area. ENVI uses one band per input raster; applies your optional spectral index; and creates one band per date, using a timestamp for the band name. Once the temporal cube is created, you can use it as you would any other raster with ENVI's tools, such as supervised or unsupervised classification, to perform time-series analysis.
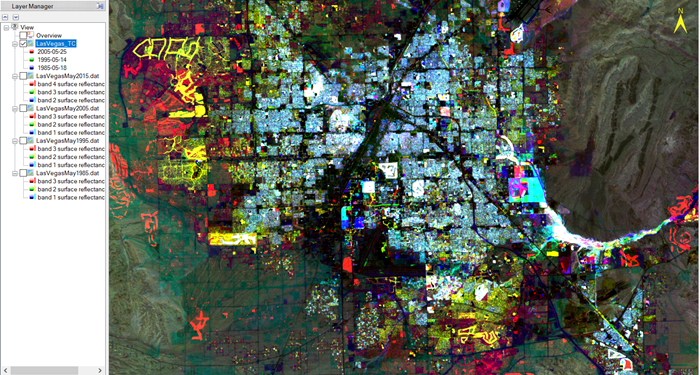
Three bands are loaded in the Layer Manager, with the newest timestamp first, and you can change the RGB bands and their order. The image is in color, where red, blue, and yellow represent the progression of change over time in that space.
To view the bands in an animation, use Band Animation. You can also open the Temporal Profile look at how the pixels changed over time.
To create a temporal cube in ENVI, use the Build Temporal Cube tool.
You can also write scripts to build a temporal cube using the BuildTemporalCube task.
Build a Temporal Cube
Use these steps to creates a multiband raster, where each band represents a different date/time. It can build a raster from an array of single-band rasters, or it will calculate the same spectral index for each input raster, then merge all the spectral index rasters into the temporal cube.
-
From the Toolbox, select Spatiotemporal Analysis > Build Temporal Cube.
- Select at least two input files, and click OK. All input rasters must have valid "acquisition time" metadata to be able to build a temporal cube.
-
From the drop-down list, select the Overlap Operation to use when building the temporal cube:
-
Optionally select a Spectral Index from the list to apply to the input rasters. If this is not set, the input rasters must be single-band and they will be used directly to produce the temporal cube.
-
The bands in the temporal cube will be named by date. Specify the Date Format to use for the band names:
-
Mon-DD
-
Mon-YYYY
-
MM-DD
-
MM-DD-YYYY
-
MM-DD-YY
-
MM-DD-YYYY HH:MM:SS
-
MM-DD-YY HH:MM:SS
-
DD-Mon
-
DD-MM
-
DD-MM-YYYY
-
DD-MM-YY
-
DD-MM-YYYY HH:MM:SS
-
DD-MM-YY HH:MM:SS
-
YYYY-MM-DD
-
YYYY-Mon
- To write the output to disk, select the File radio button and specify a filename and location. To produce output in memory only, select the Virtual radio button.
- Enable the Display result check box to display the output in the view when processing is complete. Otherwise, if the check box is disabled, the result can be loaded from the Data Manager.
-
To reuse these task settings in future ENVI sessions, save them to a file. Click the down arrow next to the OK button and select Save Parameter Values, then specify the path and filename to save to. Note that some parameter types, such as rasters, vectors, and ROIs, will not be saved with the file. To apply the saved task settings, click the down arrow  and select Restore Parameter Values, then select the file where you previously stored your settings.
-
To run the process in the background, click the down arrow next to the OK button and select Run Task in the Background. If an ENVI Server has been set up on the network, the Run Task on remote ENVI Server name is also available. The ENVI Server Job Console will show the progress of the job and will provide a link to display the result when processing is complete. See ENVI Servers for more information.
- Click OKto build the temporal cube.
See Also
Working with Raster Series, Temporal Profile