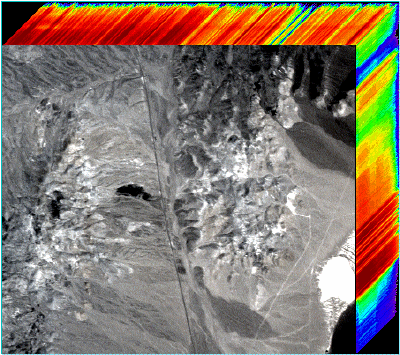
Image Cubes
Use the Build 3D Cube tool to take a multispectral file or hyperspectral file (which may be spatially and spectrally subsetted) and create an RGB image with the spectral slice of the top row and far-right column in a perspective view. The spectral slices are stretched and a user-selected color table is applied. The final image is a 3D, RGB, color-composite image cube. All of the intermediate processing occurs file-to-file, or in memory, depending on your preferences. (Temporary files created during the process are deleted after they are used).
- From the Toolbox, select Spectral > Build 3D Cube. The 3D Cube Input File dialog appears.
- Select an input file and perform optional spatial and spectral subsetting, then click OK. The 3D Cube RGB Face Input Bands dialog appears.
- Select the RGB bands to place on the face of the image cube by clicking on the desired bands.
- Click OK. The 3D Cube Parameters dialog appears.
- Select the color table for the side and top of the 3D cube from the list of standard ENVI/IDL color tables.
-
Enter a value for Spectral Scale to apply a multiplier to the pixel dimensions of the side and top.
Tip: A factor greater than 1.0 exaggerates the side and top dimensions of the cube by replicating the spectral profiles. This is particularly useful for image cubes that contain a small number of spectral bands.
- Enter a Border value to modify the number of border (background) pixels surrounding the output image.
- Select output to File or Memory.
- Click OK. ENVI adds the resulting output to the Layer Manager.
