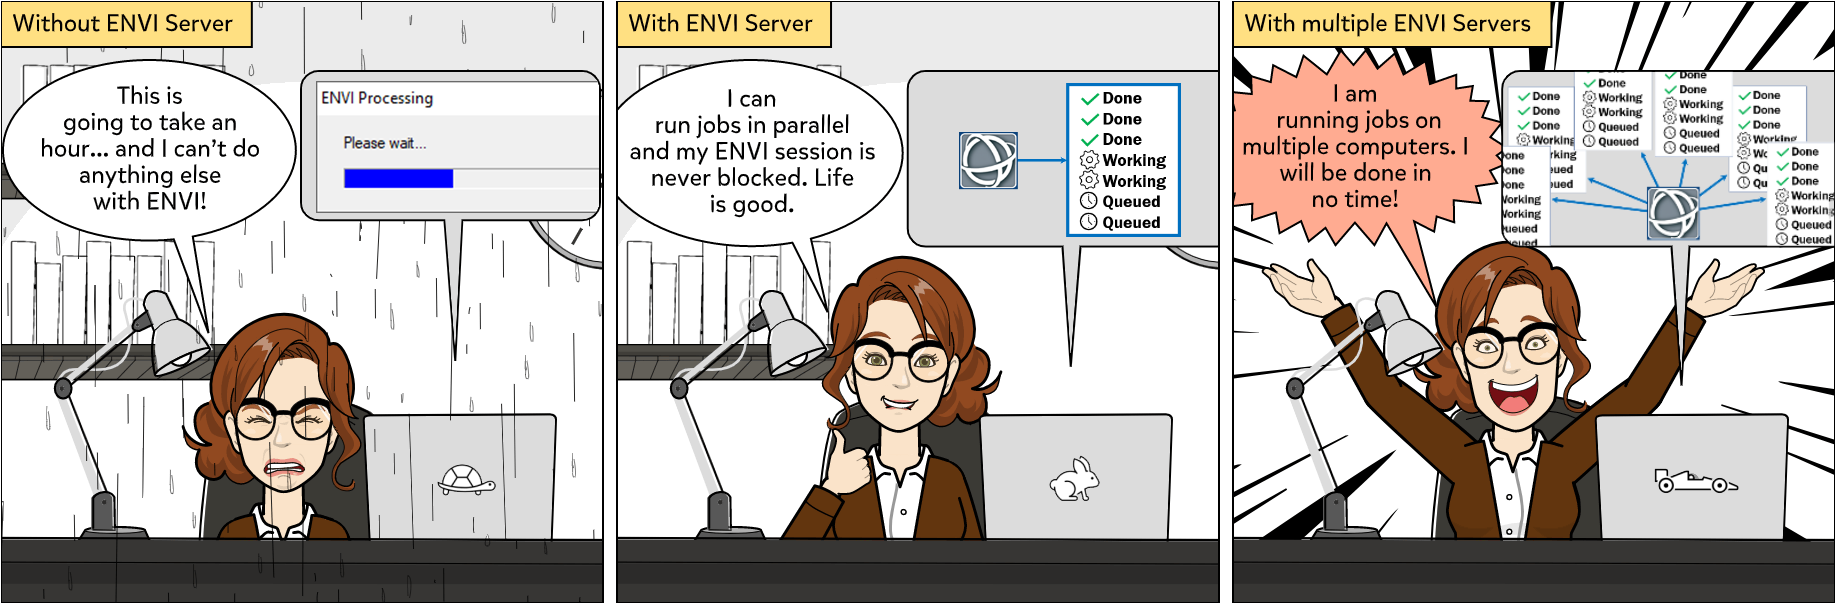
In this tutorial, you will learn how to start and use a local ENVI Server so you can run processes in the background and continue working in ENVI without waiting for each task to finish. You can even close ENVI and the jobs will continue to run on the ENVI Server. This tutorial will also show you how to expand your processing capacity by configuring additional ENVI Servers in a distributed environment. Jobs that would take hours or days on a single computer can run in parallel on several computers, where each ENVI Server can run multiple jobs at the same time.
See the following sections:
Start a Local ENVI Server
Start an ENVI Server on your computer with the following steps:
- Start ENVI.
- From the ENVI main menu bar, select Server > Start ENVI Server. The Start ENVI Server dialog appears.
-
Use the default settings in the Start ENVI Server dialog:
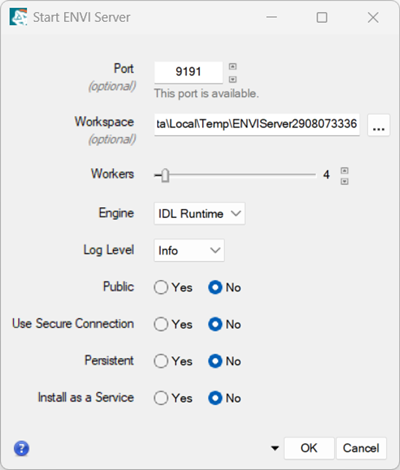
- Click OK to start an ENVI Server named localhost:9191.
Run Tasks on the Local ENVI Server
In these steps, you will run an ENVI task in the background using the local ENVI Server. This will enable you to complete other activities in ENVI while the job is running.
- In the ENVI Toolbox, expand the Band Algebra folder and double-click Spectral Indices. The Data Selection dialog appears.
- Click the Open File button
 .
.
- Navigate to the INSTALL_DIR\ENVIxx\data folder of your ENVI installation path and select qb_boulder_msi. Click Open.
- Click OK in the Data Selection dialog. The Spectral Indices dialog appears.
- In the Index list, select Green Difference Vegetation Index.
- Select the File radio button and leave the Output Raster field blank.
- Click the drop-down arrow
 next to the OK button and select Run Task on http://localhost:9191.
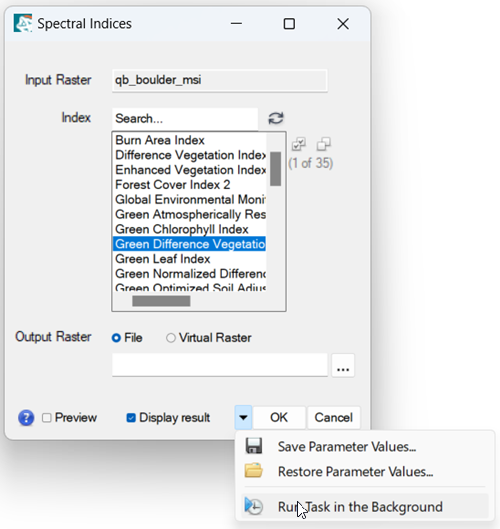
The Spectral Indices task runs in the background and the ENVI Job Console displays. The tab for http://localhost:9191 reports the processing status of the job. You can continue to do other things in ENVI while the job is running.
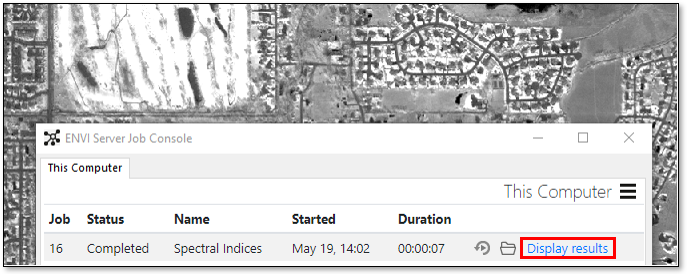
-
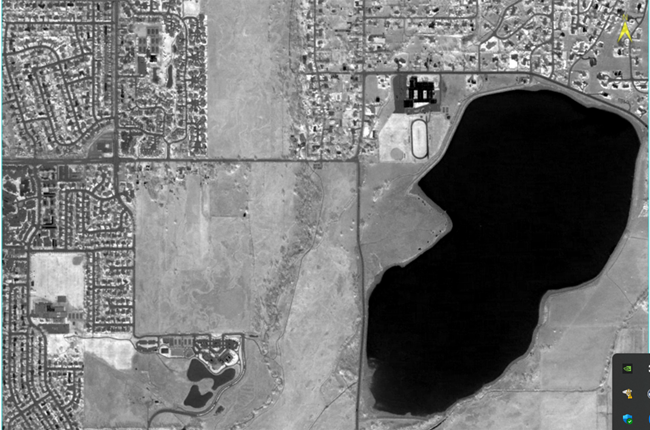
When the job is complete, click the Display Results button  in the ENVI Job Console to display the Green Difference Vegetation Index (GDVI) image in the view; for example:
- ENVI writes the GDVI image to a numbered folder in your ENVI Server workspace. Click the folder icon
 to open that folder in Windows Explorer or in the Linux terminal window.
Next, run more Spectral Indices jobs in the background on the local ENVI Server:
- Click the
 icon in the ENVI Job Console to rerun the Spectral Indices task.
- Select any Index.
- Click the drop-down arrow and select Run Task on http://localhost:9191.
- While that job is running, click the icon in the ENVI Job Console again, select another Index, then select Run Task on http://localhost:9191. Repeat these steps as many times as you want.
The ENVI Job Console lists each job that you ran. You can click Display results for each job to view the spectral index image that was created. The results of each job are written to a new numbered subfolder in your local ENVI Server workspace.
Run Models on the Local ENVI Server
In these steps, you will run an ENVI Modeler model in the background using the local ENVI Server.
- From the ENVI main menu bar, select Display > ENVI Modeler. The ENVI Modeler appears.
- From the ENVI Modeler menu bar, select File > Open Example > Simple Model. The example model for Simple Model appears.
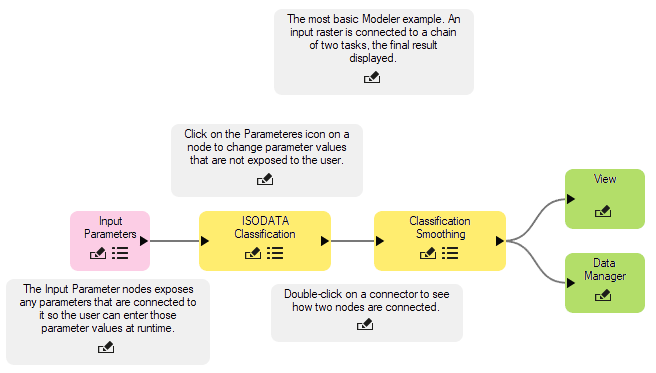
This model performs ISODATA unsupervised classification and smooths the classification image. This model includes green-colored View and Data Manager nodes. When the model runs, it will display the resulting image in the current view and add the result to the Data Manager. When you run models in the background, use an Output Parameters node in the model instead of the View node so that the results will be displayed in the ENVI Job Console. You will do this in the next step.
- Select the View node and press the Delete key on your keyboard to remove it from the model.
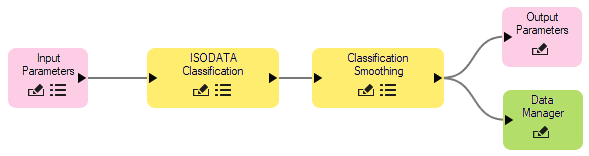
- In the Basic Nodes list, double-click Output Parameters to add an Output Parameters node to the model.
- Drag the Output Parameters node to the end of the model, then draw a connector between it and the Classification Smoothing node; for example:
- Click the drop-down arrow next to the Run button at the top of the ENVI Modeler and select Run Model on http://localhost:9191.
- When the model runs, you will be prompted to select an Input Raster. Click the Browse button
 and select qb_boulder_msi from the ENVIxx\data folder of your installation path.
- Click OK in the Data Selection dialog, then click OK in the Simple Model dialog.
- While the model runs in the background, the ENVI Job Console shows the status of the job.
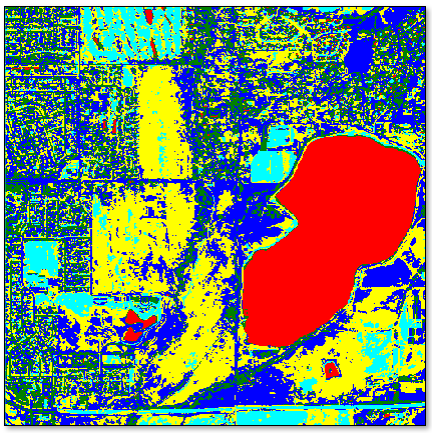
- When processing is complete, click the Display Results link in the job console to view the smoothed classification image.
Next, you will learn how to batch-process multiple datasets in the ENVI Modeler.
Perform Batch Processing in the ENVI Modeler
In this section you will learn how to process multiple datasets in parallel using the local ENVI Server.
- Select the Input Parameters node and the Data Manager node, then press the Del key on your keyboard to remove them from the model.
- In the Basic Nodes list, double-click Dataset. The Select Type dialog appears.
- Click Raster. A blue-colored Data node is added to the model, and the Data Selection dialog appears.
- Click the Open File button in the Data Selection dialog.
- Go to the ENVIxx\data folder of your installation path and select Avon.dat, then click Open.
- In the Data Selection dialog, use Ctrl-click to select the following files and click OK:
The Data node name changes to 2 Rasters.
- In the Basic Nodes list, double-click Iterator to add an Iterator node to the model.
- Drag the Dataset node and the Iterator node to the front of the model as follows, and draw a connector between the Dataset node and the Iterator node:

- Now draw a connector between the end of the Iterator node and the front of the ISODATA Classification node. The Connect Parameters dialog appears.
- Click the Output button on the left side of the Connect Parameters dialog. A red line connects Output to Input Raster:
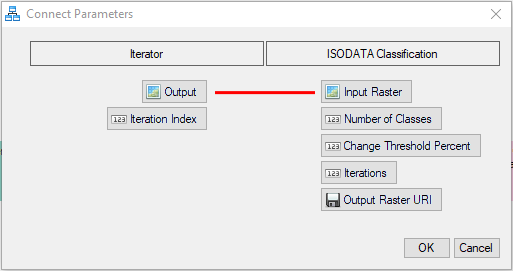
- Click OK in the Connect Parameters dialog. The model should look like this:

The Iterator node allows you to batch-process both rasters specified in the Dataset node (Avon.dat and qb_boulder_msi). If you ran this model now, the rasters would be processed one at a time in the current ENVI session. The next steps describe how to run the model as multiple, parallel jobs on your local ENVI Server.
- Click the
 button in the Iterator node. The Set ENVI Servers dialog appears.
- Click the Add Servers button in the Set ENVI Servers dialog.
- In the Add Servers dialog, select http://localhost:9191. and click OK. The jobs will run on your local ENVI Server.
- Click OK. The model is now ready to run.
-
Click the Run button at the top of the ENVI Modeler. As the model runs, select Server > Job Console from the ENVI main menu. The ENVI Job Console shows two separate jobs, one for each input raster.
-
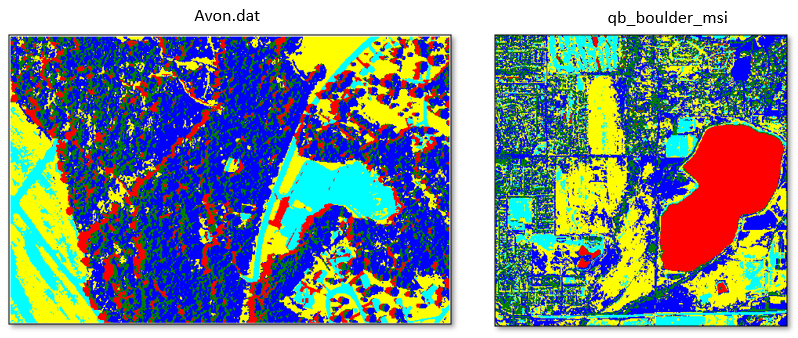
When the jobs are complete, use the Display Results link next to each job to individually display the output files in the view. The smoothed classification image results from Avon.dat and qb_boulder_msi should look like the images below:
- When you are finished, save the modified model to a new file on your computer, then close the ENVI Modeler and ENVI Job Console.
This was a simple example of running multiple jobs in the ENVI Modeler, each with a different input raster. By adding an Iterator node to the model and specifying the ENVI Server where the jobs will run, you split the work into parallel processes that both ran on the same ENVI Server.
You can also run tasks and models on multiple ENVI Servers. The next section describes how to configure ENVI Servers for distributed processing.
Optional: Distributed Batch Processing Using Multiple ENVI Servers
You can add one or more computers as ENVI Servers to use those resources for distributed processing. For example, if you have one local ENVI Server and three additional ENVI Servers on a network, you can scale jobs by sending them to multiple computers working in parallel. This will finish all jobs in a fraction of the time it would take for a single computer, particularly if the other computers have powerful hardware and resources.
An ENVI Server that will be used on the network must have the following installed:
- ENVI
- Windows or Linux operating system (a network of ENVI Servers must use the same operating system to access the data with the same network paths)
- A valid license for ENVI and any additional modules that you might run on this server
- If custom tasks will be used in any jobs, they must be installed on the remote server.
In addition, ensure that the input data is in a shared location that both client and server computers can access.
To start an ENVI Server to use on the network:
- Make note of the external URL of the computer; you will need this information later.
- Start ENVI.
- From the ENVI main menu bar, select Server > Start ENVI Server. The Start ENVI Server dialog appears.
-
Set these ENVI Server parameters as follows. For all other parameters, use the default settings:
- Workspace: Enter the network location where the shared data is stored.
- Public: Set to Yes.
- Install the Server as a Service: If you set this parameter to Yes, make sure the owner of the service has the appropriate read/write permissions to the Workspace location.
- Click OK to start the ENVI Server.
To make the remote ENVI Server available on the client computer:
- From the ENVI main menu bar, select Server > Manage ENVI Servers. The Manage ENVI Server dialog appears. The entry https://localhost:9191 is the local ENVI Server that you started earlier in this tutorial.
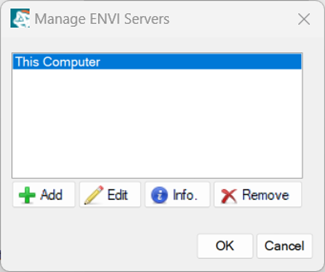
- Click the Add button. The Add ENVI Server dialog appears.
- In the Server URL field, enter the URL of the ENVI Server to add. The URL can be the server name without the port number; a port number is not required if the ENVI Server is using the default port (9191). For non-default ports, include the port number in the URL; for example:
remote_envi_server_name:port_number
-
Enter a custom Name to easily identify the server. The name will show in the Manage ENVI Servers dialog, when you select an ENVI Server to process a job, and as a tab name in the ENVI Job Console.
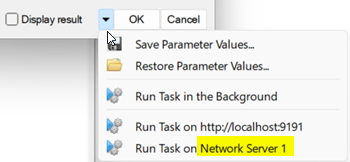
- Click OK to add the server.
- From the ENVI main menu bar, select Server > Manage ENVI Servers. The Manage ENVI Servers dialog appears.
- Select the ENVI Server you just added from the list, then click the Info button
 . The ENVI Server Information dialog shows information about that server, including the software modules and versions that are installed on it.
- Select File > Close to dismiss the ENVI Server Information dialog, then click OK in the Manage ENVI Servers dialog.
Now you can run tasks and models on the network ENVI Server. Click the drop-down arrow in a task dialog or in the ENVI Modeler and select Run Task on remote_envi_server_name or Run Model on remote_envi_server_name.
This concludes the tutorial. When you are finished, close ENVI.