This topic describes options for generating and running code from models. See the following sections:
Generate IDL Programs and ENVI Toolbox Extensions
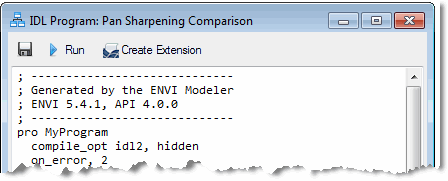
To generate IDL code for a model, select Code > Generate IDL Program from the ENVI Modeler menu bar. You must have an ENVI+IDL license to use this feature. The IDL code is displayed in a new Program window; for example:

From here, you can do the following:
- To save the program to an IDL program file (.pro), click the Save button
 .
.
- To run the program, click the Run button.
- To create a tool from the model that you can add to the ENVI Toolbox, click the Create Extension button. In the Create ENVI Extension dialog, provide a name for the tool in the Extension Name field. The default location for saving the extension is shown. If you want to change this, select another option from the drop-down list. Click OK. The tool will be listed under the Extensions folder in the ENVI Toolbox.
Generate Python Programs
You can generate Python code for a model if you want to use Python to call the ENVI Task Engine. To run the Python code that is generated, you must have the following installed:
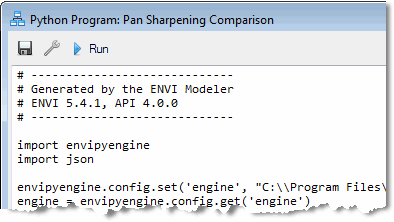
Select Code > Generate Python Program from the ENVI Modeler menu bar. The Python code is displayed in a new Program window; for example:

From here, you can do the following:
- To save the program to a Python program file (.py), click the Save button
 .
.
- To run the program, click the Run button.
- To configure the output directory of the Python program, click the Configure Task Engine button
 . Enter an Output Directory and click OK. All of the files generated by the model will be written to that directory.
When running a Python program, the results will not be displayed or added to the Data Manager in ENVI. All of the output rasters or vectors that are connected to an Output Parameters node will be preserved in the output folder. Other intermediate files that are created will be immediately deleted upon running the program.
Generate Metatasks
You can save a model to a task file (.task) on disk so that you can share the task with others or use it in the ENVI API, similar to a custom task.
Follow these steps to save a model as a task file:
- Decide what inputs and outputs your metatask needs to expose. See Define Metatask Inputs and Outputs for details.
- Select Code > Generate Metatask from the ENVI Modeler menu bar. The task code is displayed in a new Metatasks dialog.
- Choose a save option using the Save button or Publish Task option.
Save Button
Click the Save button  in the Metatask dialog. Select an output filename and directory for the .task file. See Deploy Custom Task Files in ENVI API Programming for recommendations on where to save .task files on your system.
Publish Task
The Publish Task option is similar to the Save option, except that it makes the task known to the current ENVI session and adds it to the Task list in the ENVI Modeler. It automatically saves the .task file to the preferred location on your system. This is the custom_codex_x folder under your default IDL preferences directory, where x_x is the ENVI software version. For example:
- Windows: C:\Users\<username>\.idl\custom_codex_x
- Linux: /users/<username>/.idl/custom_codex_x
- Mac: /Users/<username>.idl/custom_codex_x
Follow these steps:
- Click Publish Task in the Metatask dialog. In the Publish Metatask dialog, enter a Name, Display Name, and optional Description for the task. The Display Name is the name of the task as it appears to the end user.
- Enter a Revision number for the task. This is a string with the semantic revision number of the task. Semantic versioning provides a quick way to extract information about a new task. The default value is 1.0.0.
- Optionally enter a comma-separated list of Tags to categorize the task by function. See Search Available Tasks for more information about tags.
- The default location for saving the task is shown. To change this, select another option from the drop-down list.
- If you want to publish the task to ArcGIS Pro check the appropriate box; this will make the task available to use directly from the ArcGIS Pro system toolbox the next time the product is started. Click OK. To publish to ArcGIS Pro, both ArcGIS Pro and ENVI Py for ArcGIS Pro must also be installed.
Run Models on ENVI Servers
You can run models in the background on a local ENVI Server or on remote ENVI Servers in a distributed processing environment. The Server menu entry lets you add and manage new ENVI Servers, display the ENVI Server Job Console, and run models. You can also click the down arrow  next to the Run button to run models. See the ENVI Servers topic for more information on using these features.
See Also
Create Metatasks From Models, Toolbox Extensions, Metatasks, Custom Tasks, Deploy Custom Task Files, Run ENVI Analytics at the Command Line, ENVI Servers