Creating Custom PowerPoint Reports in ENVI Tutorial
In this tutorial you will create a custom PowerPoint template, populate the template items with ENVI graphical elements, and chip the contents of an ENVI view to the template to create a final report.
See the following sections:
Create a Custom PowerPoint Template
- Start PowerPoint.
- Select File > New > Blank Presentation.
- Select Design in the main menu. From the ribbon, select Slide Size > Standard (4:3) or Widescreen (16x9), depending on what aspect ratio better fits the screen where you will be showing your presentation.
- Delete any default graphical elements in the presentation.
- Click Insert in the main menu, then select Shapes > Rectangles from the ribbon.
- Draw one large rectangle that fills most of the slide. This is a placeholder for the view chip that you will assign later.
- Set the Fill option to No fill.
- Set the Outline option to No outline.
- Draw a long rectangle near the top of the slide. This is a placeholder for text that you will enter later.
- Use the default fill color.
- Set the transparency to 30%.
- Set the Outline option to No outline.
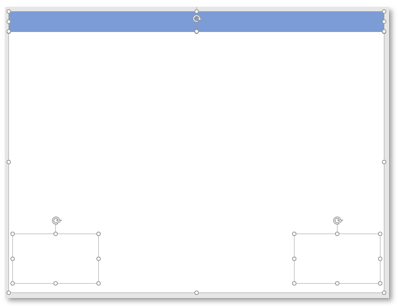
- Draw two small rectangles near the bottom of the slide as placeholders for a reference map and a north arrow. Select both rectangles and:
- Set the Fill option to No fill.
- Set the Outline option to No outline.
The following image shows an example:
- Select File > Save As and name the output file MyTemplate.pptx.
- Close PowerPoint.
Next, you will assign ENVI graphical elements to the rectangles defined in the PowerPoint template.
Configure the Template
- Start ENVI.
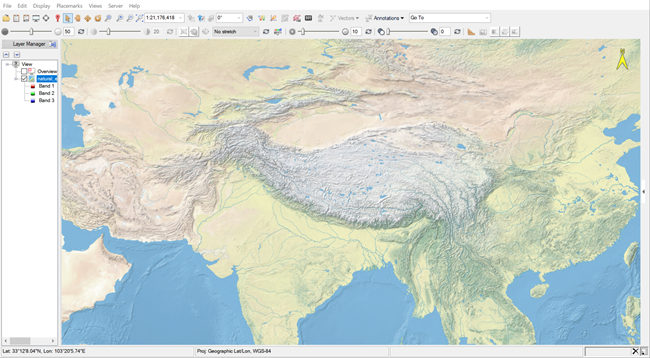
- From the ENVI menu bar, select File > Open World Data > Shaded Relief. A natural-color shaded relief image appears in the display.
- Pan and zoom to an area of interest.
- Expand the ENVI application to fill your entire monitor.
- Move the cursor between the view and the Toolbox (on the right side of ENVI) until the
 icon appears. Then double-click to hide the Toolbox. This and the previous step help to maximize the view that will be chipped to PowerPoint. The following image shows an example:
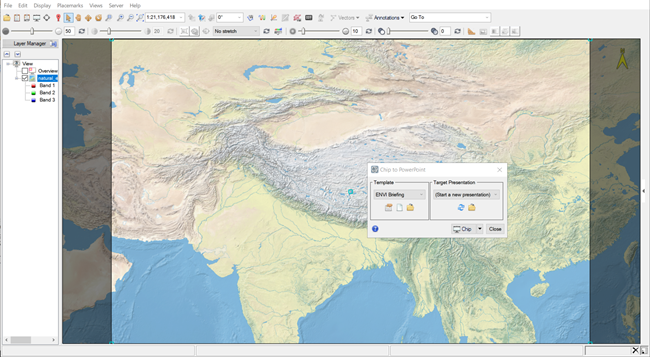
- In the ENVI Toolbar, click the Chip to PowerPoint button
 . The Chip to PowerPoint dialog appears. A window shows the area that will be included in the chipped result, at full resolution. This is called the view chip window. Areas outside of the window will be cropped in the PowerPoint presentation.
-
In the center of the view chip window is a small, cyan-colored square. Move your cursor over this square until a  icon appears. If desired, click and drag to center the view chip window over a different location. The following image shows an example. Do not resize the view chip window using the corner handles, as this will change the resolution of the view area.
- In the Template section on the left side of the dialog, click the New Template button
 . A Select PowerPoint File dialog appears.
- In the Target Presentation section on the right side of the dialog, keep the default selection (Start a new presentation).
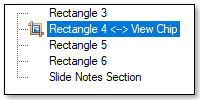
- Select the file MyTemplate.pptx that you created earlier, and click Open. The Configure PowerPoint Template [MyTemplate] dialog appears. The top part of the dialog lists the four rectangles that comprise the template, while the lower part shows the layout of the rectangles.
- Click on an item in the list to highlight the corresponding location of the element in the layout view; for example:

Next you will associate each PowerPoint rectangle with an ENVI graphical element.
- Click on the largest rectangle in the layout view to select it.
- Right-click and select View Chip. The view chip area you selected in Step 7 will occupy the space in this rectangle. A <--> symbol in the list view indicates that the rectangle is associated with an ENVI graphical element—in this case, a view chip.
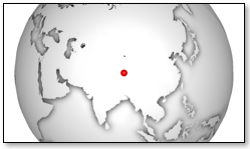
- Select one of the smaller rectangles near the bottom of the layout view, then right-click and select Reference Map. The area within the rectangle will be filled with a 3D globe showing the location of the view chip; for example:
Tip: To change the type of reference map, double-click the reference map rectangle to display the Reference Map properties dialog. Change the Type to Online Map, then click OK.
- Select the other rectangle near the bottom of the layout view, then right-click and select North Arrow. The area within that rectangle will be filled with a north arrow.
- Select the long rectangle near the top of the layout view, then right-click and select Text.
- Double-click the text rectangle to display the Text properties dialog.
- In the Text field, enter a title for the presentation, the click OK.
Tip: If the currently selected view has the appropriate georeferencing information and acquisition time metadata, you can enter special strings in the Text field to display map and date/time information. These strings are listed in the Text properties dialog. Instead of entering a title, for example, you could type Center: %lat%, %lon% to display the center coordinates of the image.
- Click OK in the Configure PowerPoint Template [My Template] dialog.
Now that you have configured the template, you will create a report by chipping the view to PowerPoint.
Create a Report
- Click the Chip button in the Chip to PowerPoint dialog. In the PowerPoint application, The chipped view and ENVI graphical elements are added to a new PowerPoint slide; for example:
- If you do not like the layout of items in the report, you can either:
- Rearrange them in PowerPoint, or
- Click the Configure Template button
 in the Chip to PowerPoint dialog. Then change the default properties of each element as needed.
Tip: Each time you experiment with different template configurations and click the Chip button, a new slide is appended to the existing presentation. You can remove the last slide that was added by clicking the arrow button next to Chip and selecting Delete Last Slide.
- To save the current slide to a PNG image file, click the arrow button next to Chip and select Export Slide as Image.
- This concludes the tutorial. Close ENVI by selecting File > Exit from the menu bar.
ENVI also provides several predefined templates that you can use. See Chip ENVI Views to PowerPoint for more information.